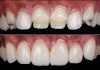
The location of the prosthetic margin and its relationship to the gingival margin has been one of the most controversial issues in prosthodontics, as gingival recession is usually associated with a defect in the margin at the intrasulcular level that produces an inflammatory response. Although minimally invasive dentistry has limited the indications for full-coverage restorations—given the growing emphasis on preserving healthy tooth structure—they are still necessary in several clinical situations. When planning full-coverage restorations, the margins should be positioned supragingivally to preserve tooth structure and avoid damaging the periodontal tissues. However, in some clinical situations, clinicians are required to place the margins subgingivally, regardless of the preparation being vertical or horizontal.

Fig.1
Vertical preparations have been extensively described in the past and revised in recent years, with the first publications dating back to the 50s and 60s for the treatment of teeth following resective periodontal surgery. These vertical preparation techniques are shoulderless (feather-edge, knife-edge, bevel) and edgeless. Recently, the so called “biologically oriented preparation technique” (BOPT) has been described, showing advantages for soft tissue stability, gingival scalloping and highly esthetic results. Although it is now a well-known technique, there is some confusion as to whether BOPT is the same as Vertiprep. Although Vertiprep (edgeless type) is part of BOPT, it’s not the same; BOPT involves internal instrumentation of the gingiva in a flapless approach, stabilising the tissues by creating a new CEJ and is recommended for periodontally healthy teeth, while Vertiprep alone is an option for periodontally compromised teeth.

Fig.2
Nonetheless, there is still no consensus on the ideal finishing line when subgingival margins are indicated. The site, patient characteristics, and the clinician’s judgment all influence the choice of margin design. Identifying the appropriate indications is essential for selecting the most suitable margin design.

Fig.3
Difference between vertical preparations, note that the Edgeless type has no convexity, giving a coronally convergent preparation. Meanwhile, the shoulderless has two different slopes, one convergent apically and the other coronally, starting in the sulcus.


Fig.4
In this article we present the case of a 30-year-old patient who came to our clinic from the Netherlands with the desire to improve her smile after unsatisfactory composite restorations in the anterior quadrant. We can see how the composite restorations invade the biological space, causing chronic gingival inflammation. Additionally, the restorations exhibited diastemas and a transposition of tooth 23 (canine) into the position of tooth 22 due to agenesis. This transposition was clinically evident as a prominent canine root visible through the gingiva. Data were collected including patient history, intraoral scans, intraoral and extraoral photographs, occlusal assessment, oral habits, masticatory movements and joint position (CR). After evaluation of the remaining teeth, a treatment plan was proposed: Invisalign Go treatment for 6-8 months to level the gingival margins, improve the anterior and posterior occlusion and distribute the spaces for future prosthetic restorations. The definitive restorative phase included crowns using the BOPT technique on teeth 12, 11, and 21, as well as a zirconia bridge involving teeth 22, 23 (pontic), and 24. Additionally, two lithium disilicate veneer onlays (vonlays) with buccal staining were planned for teeth 14 and 15.

Fig.5
Once the treatment plan was accepted by the patient, the previously acquired intraoral scans—taken with the iTero Element 5D intraoral scanner (Align Technology)—were utilized to plan prosthetically guided orthodontic movements through the design of the final restorations. The integration of 3D restorative design within the same ClinCheck digital platform, using the Smile Architect tool, provides a more predictable approach to space management.

Fig.6
After seven months, a more favorable occlusal and esthetic condition was achieved, providing an optimal situation to step on to the esthetic phase of treatment with a more conservative approach to both soft and hard tissues.

Fig.7
Close-up view of the intraoral situation after orthodontic treatment.

Fig.8
Occlusal view of the intraoral situation following orthodontic treatment revealed the thin bucco-lingual dimension of teeth 11 and 21. The buccal enamel on these anterior teeth was virtually absent.

Fig.9
Smile appearance following orthodontic treatment. The patient’s esthetic requirements and expectations—addressed during the diagnostic phase—were carefully considered when determining the type of restoration and the positioning of the restorative margins. A tooth-by-tooth assessment was essential to guide the decision-making process. Based on functional and esthetic objectives, a BOPT (Biologically Oriented Preparation Technique) approach was chosen as the most appropriate solution.

Fig.10
Immediately after removal of the orthodontic attachments, an intraoral scan was taken. In order to start any treatment in the esthetic zone, the patient’s consent is required. The first step in performing the BOPT technique involves creating a diagnostic wax-up and fabricating a provisional restoration.

Fig.11
An anatomical wax-up of the planned restorations was digitally created using dental design software (Exocad, Exocad GmbH), incorporating the planned gingivectomy for tooth 21. The upper model, including the digital wax-up, was exported in STL format and subsequently used to print a 3D model.

Fig.12
A mock-up was fabricated using a bisacrylic resin (Structur SC, Voco GmbH). Clinical evaluation of the mock-up during smiling and speaking is crucial. Tooth 22 appeared short in height and deficient in inciso-distal volume, leading to an improper axial inclination. Similarly, tooth 21 required incisal lengthening.

Fig.13
Similarly, the design had to be evaluated intraorally. During this stage, the need for a connective tissue graft at site 23 was confirmed, as a clear lack in buccal gingival volume was observed.

Fig.14
Following the mock-up evaluation, gingivectomy was performed using a 15C scalpel, as the mock-up had been specifically designed to guide this procedure. Gingivectomy can be performed using digitally designed splints or using an indirect guide such as a snap-on guide. However, the traditional method of placing an acrylic mock-up is valid and is still one of the most commonly used.

Fig.15
A connective tissue graft was performed by the surgeon during the same appointment.

Fig.16
After seven weeks, stabilization of the connective tissue graft was observed, allowing for the application of pressure to begin shaping the pontic site.

Fig.17
Once the soft tissues had healed and the design was approved by the patient, we could proceed to the BOPT tooth preparation. It consists of two parts, the first being the supragingival preparation. Once the tooth has been prepared at the supragingival level, the subgingival grinding is performed.
Supragingival reduction was performed directly through the mock-up. After the administration of local anesthesia, intrasulcular mapping was carried out to determine the position of the junctional epithelium. According to Loi, the anatomical limit of the preparation must be the CEJ, so it is recommended that the bur does not come into contact with the bone crest. Once the CEJ is located, the tooth is prepared. If the CEJ cannot be located during preparation, it will not be possible to erase or eliminate it, so instead of the gingival margin adapting to the temporary restoration during the provisional phase, it will gradually migrate apically until it finds the anatomical CEJ.
A fundamental aspect of the BOPT technique is the correct inclination of the bur throughout the preparation process.

Fig.18
Once the indirect provisional restoration has been relined—or, as in this case, a direct provisional has been fabricated using bisacrylic resin—the provisional is removed, revealing a concave space between the hardened resin in the sulcus and the buccal surface. This space essentially represents a negative imprint of the gingival margin, basically an impression of the gingival sulcus and surrounding tissues. We present an example of what the provisional would look like if it were relined or fabricated directly in the mouth immediately and after the cervical modification.
This step is distinctive and unique to the BOPT, as it differs from conventional techniques. After removing the provisional, the concavity is filled with acrylic or a flowable material. Once the material is set, the provisional is modified, shaped, and polished. The shape of the temporary crown should be convex and ovoid to stabilize the clot formed in the sulcus. The crown should not take up more than 0.5 mm subgingivally. Once the margins have been carefully polished, the provisional is cemented—if needed—with temporary cement, and the occlusion is checked. For optimum tissue conditioning and stabilization, the temporary restoration should stay in place for at least 4 weeks.

Fig.19
The provisional can be made directly with bisacrylic or acrylic, semi-directly with an eggshell provisional that needs to be relined, or indirectly with a PMMA provisional either milled or 3D printed on the same appointment, provided the necessary equipment is available in the clinic for same-day delivery. In this case, a mixed approach was used: an initial direct provisional was placed, followed by the placement of an indirect PMMA provisional one week later to allow for improved cervical finishing and polishing.
It is recommended to make an eggshell in PMMA and reline it directly or to 3D-print the restoration. The most important feature of this provisional is that it must be in line or in contact with the gingival margin when properly positioned to facilitate relining. In situations where there is recession the cervical contour of the provisional must still extend to reach the gingival margin to maintain tissue support and shape.

Fig.20
After 1 week, the direct provisional was replaced with an indirectly milled PMMA provisional with improved design and optimal cervical polishing.

Fig.21
Gingival appearance after 4 weeks healing.

Fig.22
Appearance of the gingiva after 4 weeks of healing. The length of the new sulcus is remarkable compared to horizontal preparations.

Fig.23
Anatomical and gingival margin modifications were made. Interproximal spaces were opened to allow more space for the interdental papillae to achieve gingival symmetry and aesthetics. The shape of the pontic was also modified.

Fig.24
Appearance of the gingiva after seven weeks of healing. The improvement in soft tissue contour becomes increasingly evident over time. The proximal modifications allowed for the creation of adequate space, enabling the papillae to re-establish themselves in a healthy and stable manner.

Fig.25
Appearance of the gingiva after another 4 weeks of healing. The increase in soft tissue volume can be observed after the creation of the neosulcus with the “Gingitage” and the stability is remarkable.

Fig.26
Vonlay preparations at teeth 14 and 15, and a BOPT preparation on tooth 13.

Fig.27
Aspect of pontic modification.

Fig.28
The final impression was taken, and multiple scans were performed to provide the dental technician with all the necessary information. These included a scan of the upper arch with the provisional restorations in place, a scan of the lower arch, and a bite registration scan.

Fig.29
The upper preparations were then scanned in HD mode, along with an extraoral scan of the provisional restoration. In the BOPT technique, removal of the provisional often causes the gingival tissues to collapse toward the tooth surface, making it difficult to capture a clear digital impression of the preparation, the sulcus, and the emergence profile. A key feature of BOPT is that the finishing line is not placed by the clinician, but rather by the technician himself—typically 0.5 to 1 mm subgingivally– thus creating a degree of uncertainty for the definition of the crown margin.
To address this, a PTFE band was gently inserted into the sulcus, left in place for 5 minutes, and then removed prior to scanning the BOPT preparations. In contrast, for the vonlays, the PTFE was left in place to expose and define the restoration margins during the scan. This method takes advantage of the PTFE’s hydrophobic nature and lack of shape memory, which allows for reliable sulcus retraction and precise capture of subgingival margins. As a result, the margin of the restoration can be placed with a high degree of accuracy and predictability in the digital impression.

Fig.30
Twin-flash and cross-polarized photographs were taken using abutment shade tabs (IPS Natural Die Material, Ivoclar Vivadent) and tooth shade tabs (VITA Classical Shade Guide, VITA Zahnfabrik) to communicate both the underlying shade of the abutments and the future shade of the restorations. It is important not to only include the final color we want to achieve in the prosthesis, but also to reference at least two adjacent shades—one lighter and one darker than the intended color.

Fig.31
The restorations were fabricated by the dental technician at Artdental Laboratory (Valencia, Spain) in accordance with the provided clinical and photographic instructions. For the crowns, 3D Prozir (Aidite, China) was used.

Fig.32
Try-in of the restorations with Variolink esthetic try-in paste (Ivoclar Vivadent SA). The first quadrant was tested with the neutral shade and the second quadrant with the light shade. The light shade was selected.

Fig.33
Extraoral view during try-in.

Fig.34
After try-in, the paste should be thoroughly rinsed off from the restorations. Anesthesia was administered and we proceeded to cement the zirconia crowns, zirconia bridge and lithium disilicate vonlays. Rubber dam isolation can be challenging due to tooth geometry and preparation type, especially with vertical tooth preparations or BOPT. Effective cementation is a critical step to ensure optimal retention, mechanical strength, and a durable seal at the tooth-restoration interface.
To aid in isolation and control of crevicular fluid, polytetrafluoroethylene (PTFE) tape—a hydrophobic fluorocarbon polymer with anti-adhesive properties—was used. A section of PTFE was perforated using a dental dam punch to match the width of the tooth preparations. The PTFE strip was placed circumferentially around the tooth and gently packed into the gingival sulcus using a reverse double-ended blade. A retraction cord was then inserted to further control crevicular fluid and improve access to subgingival margins. The restorations and teeth were then prepared for bonding. The APC concept has been followed for bonding to zirconia. It consists of air abrasion (A), 10-MDP primer (P), resin cement (C). We applied the bonding protocol for lithium disilicate (Emax, Ivoclar Vivadent SA), 30 seconds of 5%HF for 20 seconds, cleaned, dried, bicarbonate, H3P04 etch, cleaned, dried and silane (Monobond Plus, Ivoclar Vivadent SA). Teeth were air-abraided, acid-etched with ortofosforic acid 37%, silane, composite was applied, Optibond Fl (KaVo Kerr) primer was applied. A non-filled adhesive (Heliobond, Ivoclar Vivadent SA) was applied to the crowns, bridge and veneers and cemented with Variolink DC Light (Ivoclar Vivadent SA). The lithium disilicate vonlays were cemented first, starting from the centrals and working distally. The cord was removed and the ceramic crown was placed on the prepared tooth. A polymerization unit was used to pre-polymerize for 1 second and excess cement was removed with a scalpel blade. The PTFE tape was then removed from the gingival sulcus to remove excess cement from the sulcus. Then a final 60 seconds light-curing cycle was performed.
It is imperative to ensure that the excess cement is completely removed with a double-ended explorer after final polymerization. Occlusion was checked with an articulating foil (12mm Hanel Foil; Coltène) and adjusted with a high-speed diamond rotary instrument and a red-coded bur. Restorations were polished with special lithium disilicate and zirconia burs. To fix the crowns, vonlays and bridge, cervical excess cement was cleaned with a brush, followed by spot-curing with a UV lamp. Interproximal excess was carefully removed using dental floss.

Fig.35
2 months after cementation. Gingival health and high esthetics were achieved as desired by the patient.

Fig.36
Side view of the zirconia bridge and crowns. Note the gingival health and the developed ovate pontic site.

Fig.37
Conclusions
BOPT is both a prosthetic technique and a preparation-guided regenerative periodontal treatment. Its success relies on three fundamental principles: specific vertical tooth preparation, de-epithelialization of the sulcus, and the space-maintaining, clot-preserving effect of both the provisional and definitive prostheses.
The function of the BOPT crown is based on the “dominance of forms”. Any shape modification of the crown induces a corresponding response in the surrounding soft tissues. By carefully managing the provisional restoration, it is possible to guide the gingival margin coronally or apically, depending on clinical needs. These prosthetically driven modifications contribute to progressive thickening and maturation of the gingival tissues over time. The clinical relevance of this technique can be seen by observing the reaction of the tissues around the restoration. It is important to emphasize that the creation of a definitive BOPT crown requires close collaboration with the laboratory and that both the dentist and the technician must be familiar with the clinical and technical criteria. The application of this technique not only affects tissue stability and clinical response in the short term, but also in the long term.
Bibliography
- Edelhoff D, Sorensen JA. Tooth structure removal associated with various preparation designs for anterior teeth. J Prosthet Dent. 2002 May;87(5):503-9. doi: 10.1067/mpr.2002.124094.
- Carnevale G, Sterrantino SF, Di Febo G. (1983) Soft and hard tissue wound healing following tooth preparation to the alveolar crest. The International Journal of Periodontics & Restorative Dentistry 3, 36-53.
- Amsterdam A, Abrams L. Periodontal prosthesis. In: Goldman HM, Cohen DW (eds). Periodontal therapy, 4th ed St Louis: CV Mosby Co, 1968.
- Loi I, Di Felice A. Biologically oriented preparation technique (BOPT): a new approach for prosthetic restoration of periodontically healthy teeth. Eur J Esthet Dent. 2013;8:10e23.
- Al-Haddad A, Abo Arsheed NA, Yee A, Kohli S. Biological oriented preparation technique (BOPT) for tooth preparation: A systematic review and meta-analysis. The Saudi Dental Journal 36 (2024) 11–19.
- Castelo-Baz P, Freire-Álvarez-Blázquez M, Pereira-Lores P, Álvarez-Nóvoa P, Dablanca-Blanco A, Miguéns-Vila R, Martín-Biedma B. Vertical preparation: a new technique for analogical and digital impressions. Journal of Clinical and Experimental Dentistry. 2023 Jul;15(7):e590.
- Roig Vanaclocha A, Agustín Panadero R. Protocolo de cementación adhesiva en la restauración sin línea de terminación protésica (BOPT). Quintessence: Publicación internacional de odontología. 2022;10(4):236-47.
- Roig Vanaclocha A, Revilla-León M, Gómez-Polo M, Agustín-Panadero R. Polytetrafluoroethylene relative isolation for adhesive cementation of dental restorations. J Prosthet Dent. 2024 Jul;132(1):26-30. doi: 10.1016/j.prosdent.2022.06.016. Epub 2022 Aug 5.
- Tsuruta T, OdagiriY, Tsujimoto A. A Novel Isolation Technique Using Polytetrafluoroethylene Tape and Split Dam Isolation for Cementation in Bridge Restorations. Oper Dent (2024) 49 (6): E12–E18.