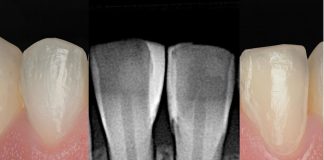
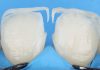
Indirect posterior restorations are extremely common in modern dental practice.
This article presents a clinical case involving a posterior overlay focusing on the tooth preparation phase, based on a quick and simple clinical protocol that can be easily applied in everyday practice.

Fig.1
The patient presented with high sensitivity on tooth 36 due to exposure of the dentin caused by failure of the existing restoration.

Fig.2
A digital impression is taken before starting any clinical procedure. This step is essential to record and preserve the original morphology of the tooth.

Fig.3
The operative field is isolated with a rubber dam. After placing the wedges, the old restoration is removed starting at the middle. At this stage, a critical decision must be made: partial or total cusp coverage?


Fig.4
In this case, after evaluating the residual tooth thickness, the buccal cusps were found to be too thin, hence being structurally compromised.

Fig.5
At the same time, the interproximal walls that normally form the box configuration have been lost due to caries and removal of the old restoration. For these reasons, cusp coverage had to be planned.

Fig.6
The first step, using the i4 bur from the indirect kit, is to perform the occlusal reduction, creating a flat and uniform preparation surface.

Fig.7
This is the result of the occlusal reduction.
At this stage, the interproximal boxes must be prepared, which will also allow complete removal of the remaining carious tissue.

Fig.8
The interproximal boxes are usually prepared to stabilize the overlay, re-establish proper contact points between adjacent teeth, and eliminate carious tissue that is frequently present in these areas.

Fig.9
Using the same bur, the interproximal boxes are opened. As shown, the preparation is now complete: one bur, two inclinations, a few minutes — simple and easy to prepare.

Fig.10
The final step is polishing the preparation with the second bur, the red-coded i5.
This is the completed preparation: simple, with open margins that adapt perfectly to digital impression acquisition and to cementation with preheated composite.

Fig.11
The polished preparation.

Fig.12
A digital impression is taken with the rubber dam in place.

Fig.13
Selective enamel etching is performed, followed by application of a universal adhesive to the tooth surface.

Fig.14
The universal adhesive is spread on the overlay.

Fig.15
The preheated composite is applied with a spatula, aiming to achieve a uniform thickness, particularly within the interproximal boxes.

Fig.16
After positioning the overlay correctly, the excess composite is removed, in this case using the Fissura instrument from the LM Arte kit, and the material is polymerized.

Fig.17
This is the result after removal of the rubber dam.

Fig.18
This is the two-week follow-up, showing the occlusal adjustment and the condition of the healed gingival tissues.
Conclusions
Indirect restorations are undoubtedly a valuable option for the clinician and consistently meet patient expectations, both aesthetically and functionally.
Because indirect restorations are part of everyday clinical practice, it is essential to adopt an operative protocol that is precise yet, above all, simple and easily reproducible.
When simple and standardized protocols are used, the risk of errors is significantly reduced. This is the philosophy that should guide modern dentistry.
Bibliography
-
- Manauta J, Salat A. Layers An Atlas of Composite Resin Stratification. 2012. Quintessence Pub.
- To cover or not to cover the cusp, that is the question. A clinical case Dr. Khalid Jamal Mohammed (https://www.styleitaliano.org/to-cover-or-not-to-cover-the-cusp-that-is-the-question/).
- Van Dijken JWV, Pallesen U. Bulkfilled posterior resin restorations based on stress-decreasing resin technology: a randomized, controlled 6-year evaluation. Eur J Oral Sci. 2017 Aug;125(4):303-309.
- Manauta J, Salat A, Devoto W, Putignano A. Layers2, direct composites: The styleItaliano Clinical Secret. 2022. Quintessence Pub.