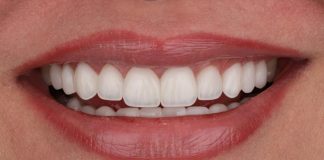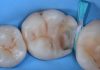



Class V restorations represent a common yet challenging clinical procedure in restorative dentistry. The cervical area is characterized by complex anatomical features, limited enamel availability, and close proximity to the gingival margin, all of which may compromise isolation, adhesion, marginal stability, and aesthetic integration. In addition, non-carious cervical lesions and cervical defects often involve both enamel and dentin substrates, requiring a restorative approach capable of ensuring reliable bonding, adequate mechanical behavior, and a natural optical outcome.
In recent years, simplified restorative strategies have gained increasing attention, particularly in daily clinical practice, where clinicians aim to reduce procedural complexity without compromising the quality of the final result. Single-shade composite systems have been introduced to simplify shade selection and layering procedures, relying on enhanced optical adaptation to blend with the surrounding tooth structure. Among these materials, Filtek™ Easy Match has been developed to provide predictable chromatic integration using a simplified shade-matching approach, allowing clinicians to manage aesthetic restorations with fewer steps.
The present clinical case describes the restoration of class V lesions using a simplified adhesive and restorative workflow with Filtek™ Easy Match composite. The objective was to achieve functional sealing, cervical contour recovery, and aesthetic integration through a minimally invasive and clinically efficient single-shade approach.


Fig.1
To achieve a predictable long-term outcome, the use of rubber dam isolation is recommended even for Class V restorations. Today, several strategies are available to obtain adequate isolation of the operative field. As shown in this image, the use of the rubber dam alone, without auxiliary devices, may not be sufficient to properly expose and isolate the cervical portion of the area to be restored.

Fig.2
The use of the LM-Gengiva instrument, designed by the StyleItaliano group, facilitates not only the retraction of the rubber dam but also the shaping of the cervical margin, thanks to the specific design of its tips. This allows the clinician to proceed with cavity cleaning without interference, while keeping the instrument in position and maintaining adequate exposure of the operative field.

Fig.3
Cavity cleaning was performed to remove debris and properly prepare the lesion for the adhesive procedures. During this step, different dentin substrates can be observed within the cervical area, highlighting the importance of careful surface management before restoration. The cavity was then air-abraded to further improve surface cleaning and increase the potential for adhesive bonding.

Fig.4
After completion of lesion cleaning, all adhesive procedures were performed. Selective enamel etching was carried out using orthophosphoric acid, followed by the application of Scotchbond™ Universal Plus adhesive according to the manufacturer’s instructions.


Fig.5
The same Filtek™ Easy Match Warm shade was used for both the flowable and paste composite materials. The flowable composite was first applied to homogenize the substrate and create a uniform restorative base. After polymerization, the high-viscosity composite was placed and sculpted to reproduce the coronal contour and restore the cervical anatomy.


Fig.6
After completing the restoration of the maxillary second molar, the same restorative workflow was applied to the first molar, following the same adhesive and composite layering procedures.

Fig.7
As for the previous tooth, the lesion was removed using a high-speed diamond bur, followed by low-speed tungsten carbide burs to complete cavity cleaning and refinement. Once the lesion had been properly cleaned, a fine-grit flame-shaped diamond bur was used to create a coronal bevel, aiming to improve the aesthetic integration of the final restoration.

Fig.8
The cavity surface was then air-abraded with 50-µm aluminum oxide particles at approximately 2 bar pressure, in order to improve surface cleaning and enhance the micromechanical conditions for adhesive bonding.

Fig.9
After air-abrasion, the adhesive procedures were performed following the same protocol described for the previous tooth.

Fig.10
After polymerization of the adhesive, Filtek™ Easy Match Flowable composite in Warm shade was applied. Using the thin tip of the LM-Fissura instrument, the material was carefully distributed over the cavity surface to obtain a homogeneous layer, while checking for the absence of air bubbles.


Fig.11
After polymerization of the flowable composite, the high-viscosity Filtek™ Easy Match composite was applied using the LM-Applica instrument to recreate the cervical contour of the dental element. A brush was then used to adapt the composite to the surface, minimizing gaps between the layers and obtaining a homogeneous and smooth restorative interface.

Fig.12
To optimize the final restoration, finishing and polishing procedures were performed step by step. Sof-Lex™ Pop-On discs were first used for contouring and finishing, starting with the brown disc, followed by Spiral Wheels to polish the restoration and obtain a smooth, glossy, and well-integrated surface.


Fig.13
Final appearance of both Class V restorations immediately after rubber dam removal. Both restorations were performed using the same Filtek™ Easy Match Warm shade, showing satisfactory aesthetic integration with the surrounding tooth structure.

Fig.14
Clinical result after 1 month of follow-up, showing stable aesthetic integration, adequate marginal adaptation, and maintenance of the cervical contour of both Class V restorations.
Conclusions
Class V restorations can be clinically challenging due to the cervical location of the lesion, the frequent involvement of different dental substrates, and the need to obtain proper isolation, adhesion, contouring, and finishing in a restricted operative field. In this context, a simplified but well-controlled restorative workflow is essential to achieve predictable and durable results.
The use of Filtek™ Easy Match allows the clinician to simplify shade selection and restorative procedures through a single-shade approach with excellent optical integration. In this case, the combined use of Filtek™ Easy Match Flowable and high-viscosity composite in the same Warm shade made it possible to first homogenize the cervical substrate and then recreate the correct anatomical contour with a simplified layering strategy.
At the same time, the instruments designed by the StyleItaliano group play an important role in improving clinical control during each operative step. LM-Gengiva facilitates rubber dam retraction and cervical margin exposure, while instruments such as LM-Fissura and LM-Applica help in the precise placement, adaptation, and modeling of the composite material. This allows the clinician to reduce procedural complexity while improving accuracy, surface adaptation, and the final morphology of the restoration.
Within the limitations of a single clinical case, this workflow shows that the combination of adequate isolation, careful surface preparation, a reliable adhesive protocol, Filtek™ Easy Match composite, and dedicated StyleItaliano instruments may represent a simple, reproducible, and clinically effective strategy for the management of Class V restorations, aiming to obtain aesthetic integration, marginal stability, and long-term functional success.
Bibliography
- Kovacs-Vajna ZM, Manauta J, Tosco V, Faccoli M, Torricelli F, Colalongo L, Richelli A, Autran F, Devoto W, Putignano A. On color adjustment potential and color blending threshold of dental composite resins. J Esthet Restor Dent. 2024 Jul;36(7):1038-1049. doi: 10.1111/jerd.13222. Epub 2024 Mar 15. PMID: 38488256.
- Devoto W, Saracinelli M, Manauta J. Composite in everyday practice: how to choose the right material and simplify application techniques in the anterior teeth. Eur J Esthet Dent. 2010 Spring;5(1):102-24.
- Layers 2 (Direct Composite Restorations), The Styleitaliano Clinical Secrets. Manauta, Salat, Devoto, Putignano, Quintessence Publishing 2022.
- Monterubbianesi R, Tosco V, Sabbatini S, Orilisi G, Conti C, Özcan M, Orsini G, Putignano A. How Can Different Polishing Timing Influence Methacrylate and Dimethacrylate Bulk Fill Composites? Evaluation of Chemical and Physical Properties. Biomed Res Int. 2020 Jan 9;2020:1965818. doi: 10.1155/2020/1965818. PMID: 32382532; PMCID: PMC7199574.