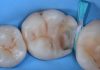



The restorative cycle of posterior teeth starts to deteriorate when cusp weakness becomes evident. After cusp failure, treatment plans often shift toward more invasive solutions, such as crowns or even extraction and implant placement. However, by assessing tooth fragility and intervening with adhesive restorations, we can protect weakened cusps and help prevent further structural damage. Too often, the remaining tooth structure is not properly evaluated before removing the existing restoration. The primary objective is to ensure that weakened cusps are properly protected.


Fig.1
Two amalgam restorations with visible marginal leakage, fractures of the weakened surrounding tooth structure, and caries underneath the amalgam restorations.

Fig.2
A tooth that loses the interconnection between the cusps and marginal ridges can lose up to 50% of its original resistance, even after restorative adhesives are applied.

Fig.3
A dedicated instrument, the LM-Arte Cusp Misura, is used to objectively assess cusp thickness. This instrument not only helps avoid inaccurate thickness measurements but also requires the clinician to remove undermined enamel.

Fig.4
Once the tooth structure has been thoroughly cleaned and the old restoration removed, the remaining structure can be properly evaluated. Ideally, the treatment plan and final restoration geometry should be adaptable on the spot, without disrupting the patient’s schedule or budget. This is particularly important when considering cusp protection while avoiding laboratory work. Note how the remaining cusps are thin, undermined, and irregular, which is a very unfavorable situation.

Fig.5
Cusp protection preparation involves five steps:
1. Depth Definition (Red): Establish the desired depth.
2. Cusp Reduction (Yellow): Reduce the cusp height by connecting the depth marks.
3. Axial Angles and Contact Opening (Blue): Adjust the axial angles and open the contacts.
4. Internal Angle Rounding (Green): Smooth and round the internal angles.
5. Cavosurface Margin Smoothing (Grey): Refine and smooth the cavosurface margin.

Fig.6
The prepared tooth structure. A preparation depth of 1.5 to 2 mm creates adequate restorative space and appropriate cavity geometry. This might sound aggressive, but the tissue removed is primarily undermined enamel.

Fig.7
The enamel structure is highlighted. Note how the enamel, particularly at the cusps, is very thick, creating an ideal restorative space. Also note how enamel thickness decreases dramatically within the proximal boxes and toward the gingival margins. For this reason, in our opinion, chamfers, shoulders, and other similar preparation designs are not indicated.

Fig.8
Cusp build-up with traditional materials is not only challenging but also time-consuming. Highly filled flowable composites, especially those with a stable handling consistency, make this procedure considerably easier: a small amount of material can simply be dispensed and shaped with a probe.

Fig.9
On the left, a highly filled and modelable material with ideal handling characteristics for this technique. On the right, an unstable, self-leveling flowable composite.

Fig.10
All cusps should be built up before matrix placement. Determining the height of the build-up is easy and intuitive, as it corresponds to the thickness created during preparation. After cusp reconstruction, the cavities are stable enough to safely support the matrices. The restorations were performed using a new-generation flowable composite, Filtek™ Easy Match Flow Bright (Solventum). The cavity base was restored with Filtek™ Supreme Flowable OA3 (Solventum) to provide opacity.


Fig.11
The proximal walls were constructed using the same Filtek™ Easy Match Flow Bright (Solventum) material. The occlusal surface can then be modeled using packable composite materials or reconstructed cusp by cusp with flowable composite. The second molar in the image demonstrates the completed occlusal surface. An excellent alternative to occlusal staining is to seal the fissures with a fissure sealant such as Clinpro (Solventum). This provides a natural, youthful appearance while improving mechanical properties by eliminating splitting structures.


Fig.12
Final result after rubber dam removal, occlusal adjustment, and polishing.

Fig.13
The one-year follow-up shows the excellent behavior of these extensive direct restorations, which function similarly to an onlay or overlay.
Conclusions
- Protecting weakened cusps should not necessarily mean laboratory work or delayed treatment.
- With a precise direct restorative protocol, cusp protection can be achieved in a single appointment.
- The restoration can always be converted into an indirect restoration later on.


Bibliography
- Spreafico R. Direct and semi-direct posterior composite restorations. Pract Periodontics Aesthet Dent. 1996 Sep;8(7):703–12; quiz 714.
- Attar N, Tam LE, McComb D. Flow, strength, stiffness and radiopacity of flowable resin composites. J Can Dent Assoc. 2003 Sep;69(8):516–21.
- Terry D. Restoring with Flowables. Quintessence Publishing; 2017.
- Manauta J, Salat A, Devoto W, Putignano A. Direct Composite Restorations. In: The Styleitaliano Clinical Secrets, Layers 2. Quintessence Publishing; 2022. Chapter 9:406–439.