


A clinical case by our Community member Dr. Ryan Schmidgall
This article and its content are published under the Author’s responsibility as an expression of the Author’s own ideas and practice. Styleitaliano denies any responsibility about the visual and written content of this work.
Orthodontic alignment and whitening can resolve position and shade, and yet a smile may still fall short of harmony when tooth proportions, gingival levels and lip dynamics are out of balance. In these situations, the restorative plan has to be driven by the face rather than by the teeth alone. Facially generated treatment planning records the patient at natural head position, using a facial reference device to capture the horizontal and vertical references of the face and carry them into the design software. The resulting two-dimensional design is then developed into a three-dimensional project and transferred to the mouth as a mock-up, where proportions, incisal edge position and gingival harmony can be assessed in vivo before any tooth structure is touched.
Preparing through that mock-up is what keeps the approach minimally invasive. Depth grooves cut through the mock-up are measured from the volume of the planned restoration rather than from the existing tooth, so reduction is limited to the space the ceramic actually needs and the preparation can remain within enamel (1, 2). This matters clinically, because ceramic veneers bonded to enamel show markedly better long-term survival than those bonded in part to dentin (3, 4).
Layered feldspathic porcelain remains the material of choice when translucency and surface character are the priority. Its final surface quality depends as much on the polishing protocol carried out at the chair as on the work of the ceramist, since the system and sequence used measurably affect the roughness and gloss of the restoration (5, 6).
In this article we present an anterior case of excessive gingival display and unsatisfactory tooth color, managed after orthodontic treatment by combining facially generated digital design, laser gingival contouring, preparation through a mock-up, and twelve layered feldspathic porcelain veneers.

Fig.1
A 36-year-old female patient presented to our clinic seeking aesthetic improvement of her smile after completing orthodontic alignment and tooth whitening. Her main concerns were the amount of gum displayed when she smiled and the color of her teeth. She was in good systemic and oral health. Clinical evaluation revealed short clinical crowns and asymmetric tooth proportions, with the gingival display exaggerated by a hypermobile lip. The treatment options were discussed with the patient, who consented to a plan combining gingival contouring with twelve feldspathic porcelain veneers from the upper right first molar to the upper left first molar (#3 to #14 Universal, 16 to 26 FDI).

Fig.2
Close-up of the initial smile. The short clinical crowns and the asymmetry between the tooth proportions are evident, together with the excessive gingival display.

Fig.3
Initial retracted frontal view in occlusion. Healthy periodontal tissues and well-aligned arches following orthodontic treatment.

Fig.4
Upper anterior teeth against a black background, documenting the natural translucency, incisal characteristics and surface texture before treatment. These records are a valuable reference for the ceramist.

Fig.5
Facial reference photograph taken with Kois Facial Reference Glasses 3.0 (Kois Center, Seattle, WA, USA). The frame records the yaw, pitch and roll of the patient’s natural head position, so the smile design is built in relation to the face at natural head position rather than to the existing teeth.

Fig.6
2D smile design in SmileCloud Biometrics (SmileCloud, Timisoara, Romania). Tooth outlines are placed within the smile frame and adjusted to the lip dynamics, defining the new incisal edge position, tooth proportions and gingival levels. The 2D design was then developed into a 3D design by Nelson Rego CDT.

Fig.7
Digital simulation of the proposed smile on the patient’s face, used to discuss the design with the patient before any treatment.

Fig.8
The 3D design was transferred to the mouth as a mock-up using Luxatemp bis-acryl (DMG, Hamburg, Germany) in a silicone index made from the printed model. This allows the patient to evaluate the proposed design in three dimensions within the framework of her lips, and to see the new smile in her own face before any preparation is done.

Fig.9
Preparation through the mock-up (1, 2). Depth grooves were cut through the mock-up at 0.3 mm cervically, 0.5 mm in the middle third and 1 mm incisally, then marked with pencil. Because the grooves are measured from the surface of the mock-up, the reduction reflects the space the final ceramic needs rather than the shape of the existing tooth.

Fig.10
Lateral view of the depth grooves in the mock-up.

Fig.11
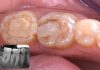
The same view after removing the mock-up. The remaining pencil marks show where the depth grooves reached the enamel. Where the mock-up already gave the ceramic enough thickness, little or no reduction was needed.

Fig.12
Frontal view of the preparations. Reduction was completed by removing the marked areas and refining the preparations with KS series burs (Brasseler USA, Savannah, GA, USA) from the Kois bur block. The preparations remained entirely in enamel. The gingivectomy was carried out at the same appointment with an 810 nm diode laser (Picasso Lite, AMD LASERS, Indianapolis, IN, USA) to idealize the tissue heights.

Fig.13
The stump shade was captured with VITA 3D-Master tabs (VITA Zahnfabrik, Bad Sackingen, Germany) rather than the IPS Natural Die guide (Ivoclar Vivadent, Schaan, Liechtenstein), because the preparations remained entirely in enamel. These photographs were sent to the laboratory. The final shade selected was BL2 to BL3.

Fig.14
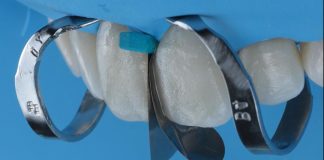
Before provisionalization, a small spot in the center of each preparation was etched with blue gel, rinsed, and a small application of Adhese Universal (Ivoclar Vivadent, Schaan, Liechtenstein) was placed and cured. This spot-etch technique keeps the provisionals stable while leaving most of the enamel untouched for final bonding.

Fig.15
Provisional restorations in Luxatemp, shade BL (DMG, Hamburg, Germany), made from the silicone index of the 3D design. The provisionals reproduce the approved design so the patient can try the aesthetics, phonetics and function. She wore them for two weeks and requested no changes, then wore them for a further two weeks while the definitive restorations were fabricated at Smiles by Rego.

Fig.16
The provisionals checked against the same facial references used at the planning stage, confirming the incisal plane, midline and smile line before the ceramic was made.

Fig.17
Twelve layered feldspathic porcelain veneers on the master model (Nelson Rego CDT, Smiles by Rego, California).

Fig.18
Lateral view of the veneers on the master model.

Fig.19
Final result at one month. Try-in was carried out with Variolink Esthetic Neutral try-in paste. The veneers were bonded in pairs under rubber dam isolation, starting with the central incisors, followed by the lateral incisor and canine, then the premolars, and finally the first molar. The intaglio surfaces were etched with 9% hydrofluoric acid for 60 seconds, cleaned and silanated. The enamel was etched with phosphoric acid and treated with Adhese Universal (Ivoclar Vivadent, Schaan, Liechtenstein). Each veneer was seated with Variolink Esthetic LC HV Neutral (Ivoclar Vivadent, Schaan, Liechtenstein) and tack-cured with a 2 mm light probe on a Bluephase Style (Ivoclar Vivadent, Schaan, Liechtenstein). Excess cement was removed with a composite brush before the final cure. Finishing and polishing were carried out dry in two steps. First, DiaShine Intra-Oral polishing paste (DiaShine, Lynnwood, WA, USA) on a felt wheel at 7,000 rpm with light, intermittent pressure. Second, Lucida polishing paste applied with a Lucida Click Felt Star (DiaShine, Lynnwood, WA, USA) at 7,000 rpm, finishing with a feather-light buff. Copious irrigation followed. The polishing system used measurably affects the surface roughness of ceramic restorations (5), and in composite a diamond polishing paste applied as the final step has been shown to improve the finish achieved by every polishing system tested (6).

Fig.20
Lateral view of the final result.

Fig.21
Lateral view of the final result from the opposite side.

Fig.22
Before and after. The initial smile above, the definitive feldspathic veneers below, aligned on the incisal edges.

Fig.23
Final situation.
Conclusions
Planning from the face and transferring the design to the mouth as a mock-up made it possible to change the color, proportions and smile line of this patient with minimal tooth reduction. Preparing through the mock-up let the volume of the planned restoration, rather than the existing tooth, dictate the depth of preparation, which keeps the preparations in enamel and supports the long-term performance of bonded ceramic (1-4). Raising the tissue heights in the buccal corridors with the laser improved the pink to white ratio and balanced the gingival display, and the provisional phase served as a test drive for aesthetics and function and as a final check against the facial references before the ceramic was made.
Layered feldspathic porcelain delivered the translucency and natural characterization this patient needed, finished at the chair with a two-step polishing protocol. Combining digital tools with facially generated treatment planning has a profound effect on the predictability of a case, and on the patient experience of it.
Bibliography
- Magne P, Belser UC. Novel porcelain laminate preparation approach driven by a diagnostic mock-up. J Esthet Restor Dent. 2004;16(1):7-16.
- Gurel G, Morimoto S, Calamita MA, Coachman C, Sesma N. Clinical performance of porcelain laminate veneers: outcomes of the aesthetic pre-evaluative temporary (APT) technique. Int J Periodontics Restorative Dent. 2012;32(6):625-635.
- Gurel G, Sesma N, Calamita MA, Coachman C, Morimoto S. Influence of enamel preservation on failure rates of porcelain laminate veneers. Int J Periodontics Restorative Dent. 2013;33(1):31-39.
- Edelhoff D, Sorensen JA. Tooth structure removal associated with various preparation designs for anterior teeth. J Prosthet Dent. 2002;87(5):503-509.
- Incesu E, Yanikoglu N. Evaluation of the effect of different polishing systems on the surface roughness of dental ceramics. J Prosthet Dent. 2020;124(1):100-109.
- Korkut B, Alkan E, Kizil Ozturk E, Turkmen C, Tagtekin D. Questioning the effectiveness of composite polishing systems by crosschecking profilometer and dental microscope outcomes. Sci Rep. 2025;15:21118.