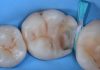



Achieving a predictable Class II restoration can be challenging when the wedge interferes with proper positioning and stability of the separation ring. The Split the Wedge Technique offers a simple modification that creates the necessary space for the ring while maintaining controlled matrix adaptation and cervical sealing. This small adjustment can simplify the clinical workflow and improve the predictability of the final restoration.

Fig.1
This is one of the most challenging situations to manage during a Class II restoration.
It is a critical point at which many clinicians struggle, and one that can frequently lead to complications during the restorative procedure.
Successfully managing this aspect can significantly improve the efficiency and speed of the procedure, while, most importantly, reducing operator stress.

Fig.2
The clinical situation is as follows: isolation has been properly achieved, and everything appears to be working as expected.
Cavity preparation and cleaning are proceeding correctly, and the wedge has been perfectly customized.
However, something is still missing, and we will realize exactly what it is during the next clinical step.

Fig.3
There is not enough space for the ring.
We can place the matrix, but at the point where the ring should engage, the wedge and the hook are already occupying the space. As a result, the ring will either not seat properly at all or will be extremely unstable.

Fig.4
What we would all like to happen is for the wedge to move mesially, creating enough space for the ring to be properly seated.
Unfortunately, this rarely happens in practice. We often use relatively large wedges because we want them to ensure proper adaptation of the matrix and provide adequate interproximal separation. For this reason, we tend to select the largest wedge that can comfortably fit into the space.

Fig.5
With “Split the Wedge” technique, the ring can be positioned within the wedge, expanding it toward the adjacent teeth.
This allows us to create the necessary space while simultaneously providing excellent stability for the ring.

Fig.6
To perform this technique, the base of the wedge must be incised to allow it to open and expand.
Only a few millimeters of the wedge need to be incised to achieve the desired effect.

Fig.7
The safest way to perform this incision is by using the back of the BELLA utility forceps, a versatile instrument with multiple applications in restorative dentistry.
This approach allows us to perform the procedure safely while minimizing the risk of injury to either the clinician or the assistant.

Fig.8
BELLA features dedicated grooves designed to guide the blade during the incision.
Simply position the wedge in place, using BELLA itself as a blade stop.
This provides controlled guidance, allowing us to make the incision at the optimal depth and length, exactly as planned.
The length of the incision will correspond to the amount of the wedge tail that has been left protruding beyond BELLA.

Fig.9
There would not be sufficient clinical space to position the ring.

Fig.10
However, once we incise the wedge, the necessary space is created.

Fig.11
In this way, the ring will seat perfectly, despite its proximity to the wedge.

Fig.12
This results in excellent adaptation of the matrix against the tooth.

Fig.13
Pre operarive image.

Fig.14
Another example of the Split the Wedge technique can be seen in this premolar.
The palatal embrasure is quite wide, and the distance between the tooth and the wedge does not allow optimal adaptation of the matrix at the mesio-palatal cervical margin.
Ideally, the wedge should flex and exert pressure on the matrix precisely at this point.

Fig.15
We combined the Diamond 24 matrix system from Polydentia on the buccal side to increase the pressure exerted by the separation ring on the matrix, ensuring a more secure adaptation.
On the palatal side, we applied the Split the Wedge technique, allowing the wedge to flex precisely in the desired area and exert pressure on the matrix where it was needed most.

Fig.16
Palatal view showing how the wedge is closely adapted to the matrix. However, pressure from the matrix at the level of the middle third of the palatal surface has been lost.

Fig.17
The ring was removed.

Fig.18
We then place a second Diamond 24 silicone insert onto the ring.
At this point, the matrix adapts perfectly around the tooth on the palatal side as well.

Fig.19
Lateral view.

Fig.20
We than cure the composite.

Fig.21
The restoration is now complete, with well-defined essential lines and an excellent emergence profile.

Fig.22
9 year control post op.
Conclusions
The Split the Wedge technique can be a simple and predictable solution for managing challenging Class II restorations, particularly when the presence of a large wedge and the hook compromises the correct positioning and stability of the separation ring.
By selectively modifying the wedge, it is possible to create the space required for the ring while maintaining controlled pressure on the matrix. This allows for improved matrix adaptation, an effective cervical seal, and a more predictable emergence profile.
A small modification to the wedge can therefore make a significant difference in the clinical workflow, improving both the quality of the restoration and the operator’s comfort.
Bibliography
- Manauta J, Salat A, Devoto W, Putignano A. Layers 2. Direct composite: the StyleItaliano clinical secrets. 2022. Quintessence pub.
- Chiodera G. Lines: una guida per eseguire restauri posteriori diretti semplici e di successo. Quintessenza Edizioni; 2022.