


Modern restorative dentistry is increasingly oriented toward biologically driven and minimally invasive approaches, especially in deep carious lesions, where preservation of pulp vitality is a primary objective. Calcium silicate-based materials, such as Biodentine™, have gained significant clinical interest due to their favorable biological properties, sealing ability, and capacity to function as a dentine substitute in deep cavities.
A key factor for long-term success is the immediate protection of the pulp–restoration complex through a stable coronal seal. However, when Biodentine is used in deep areas or in close proximity to the pulp, its early maturation phase may complicate the direct placement of the final adhesive restoration during the same appointment. To overcome this limitation, a self-adhesive flowable composite can be used as a thin protective interface over the calcium silicate material, allowing the clinician to proceed with the restorative phase without delaying treatment.
This clinical case presents a single-visit bio-bulk-fill protocol in which Biodentine™ XP is used as a dentine replacement material, Vertise Flow as an intermediate protective layer, and a body composite as the definitive restorative material.

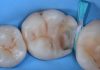
Fig.1
Initial situation. A young patient presented with a deep carious lesion under an infiltrated old composite restoration on the occlusal surface of the first lower molar. The patient reported high sensitivity to cold, with a positive pulp vitality test and a negative percussion test.

Fig.2
Following proper rubber dam isolation, cavity preparation was performed with high-speed burs to remove the pre-existing restoration and initiate caries excavation.

Fig.3
To ensure maximum removal of the carious lesion, a caries detector dye was applied throughout the cavity.

Fig.4
Following the manufacturer’s instructions, the caries detector dye was rinsed off, revealing residual carious tissue within the cavity. Further deep removal of the remaining lesion was then performed.

Fig.5
Final clinical appearance after completion of caries removal, showing a very deep cavity without pulp exposure.

Fig.6
Biodentine™ XP was applied over the deepest portion of the cavity as an indirect pulp capping material, using a bio-bulk-fill approach with a 4 mm thickness to protect the pulp in the presence of limited remaining dentine thickness and preoperative sensitivity reported by the young patient.


Fig.7
Without waiting for the complete setting of Biodentine™ XP, a thin layer of self-adhesive flowable composite, Vertise Flow (Kerr), was applied to protect the material surface and accelerate the restorative procedure.

Fig.8
After polymerization of the self-adhesive flowable layer, the cavity margins were refined to proceed with the adhesive protocol. Proper exposure and cleaning of enamel and dentine margins are essential to ensure optimal bonding of the final restoration. High-speed burs can be used safely, as the underlying Biodentine™ XP is protected by the self-adhesive flowable layer.

Fig.9
Moreover, this layer can be selectively adjusted and thinned to provide adequate space for the body composite, improving the final aesthetic outcome.

Fig.10
Etching with 37% phosphoric acid was performed on the residual cavity margins and on the self-adhesive flowable layer to remove surface impurities and create possible micro-retention for the subsequent adhesive layer.

Fig.11
Clinical appearance after phosphoric acid etching.

Fig.12
A universal adhesive was actively applied to the prepared cavity surfaces with a rub-and-scrub technique, followed by gentle air-blowing to promote solvent evaporation and obtain a uniform adhesive layer before light curing.

Fig.13
Application of the body composite, followed by adaptation and excess removal using the LM-Arte Replica Posterior instrument to rapidly reproduce the occlusal morphology.

Fig.14
The LM-Arte Replica Posterior instrument was used to simplify occlusal modeling, making the procedure faster and more predictable. The occlusal anatomy of the tooth was reproduced using the buccal cusps as anatomical guides.

Fig.15
Once the occlusal morphology had been shaped and light-cured, the grooves were characterized to enhance the three-dimensional appearance of the restoration.

Fig.16
Final result after rubber dam removal. The restoration was finished and polished following occlusal adjustment.

Fig.17
Clinical appearance of the restoration after 1 week.
Conclusions
After complete caries removal, the cavity showed a very limited remaining dentine thickness without pulp exposure, making indirect pulp capping the most conservative option to preserve pulp vitality. In this context, the rationale was to reduce the preoperative sensitivity reported by the young patient, protect the dentine–pulp complex from further irritation, and create a biological barrier capable of limiting the possible penetration of resin-based restorative materials through the deepest dentinal area.
Biodentine™ XP was therefore placed in the deepest portion of the cavity as a bioactive dentine substitute, with the aim of supporting pulpal protection and stimulating a favorable pulp–dentine response. Since immediate definitive sealing is clinically desirable but the material requires an initial setting time, a layer of self-adhesive flowable composite (Vertise Flow, Kerr) was applied over the superficial surface of Biodentine™ XP to protect it and allow continuation of the restorative procedure in the same appointment. This approach enabled a safe, efficient, and reproducible single-visit bio-bulk-fill workflow for everyday clinical practice.
Bibliography
- Cassiano Ferraz D, Rahhal JG, Dotto MEP, Ferreira LA, Sipert CR, Letra A, Silva RM, de Souza LC. Physicochemical and biological properties of Biodentine XP, Endosequence RRM, and Bio-C Repair cements. J Endod. 2025;51:1109–1117.
- Chiodera G. Lines: una guida per eseguire restauri posteriori diretti semplici e di successo. Quintessenza Edizioni; 2022.
- Frankenberger R, Koch A, Plohmann L, Beck-Broichsitter B, Becker S. The outcome of old-school indirect pulp capping over 40 years: a practice-based retrospective evaluation. Dent J. 2025;13:182.4. Manauta J, Salat A, Devoto W, Putignano A. Layers 2. Direct composite: the StyleItaliano clinical secrets. 2022. Quintessence pub.
- Ricucci D, Siqueira JF Jr, Li Y, Tay FR. Vital pulp therapy: histopathology and histobacteriology-based guidelines to treat teeth with deep caries and pulp exposure. J Dent. 2019 Jul;86:41-52. doi: 10.1016/j.jdent.2019.05.022. Epub 2019 May 21. PMID: 31121241.