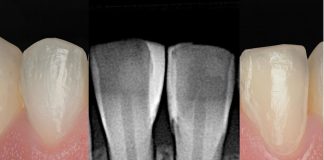
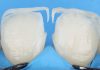
Minimal invasive restorations and bleaching therapy are popular in aesthetic dentistry. However, strategies are often misunderstood and can sometimes limit both the dentist and patient, leading to treatment failure or a lack of dramatic results. The traditional approach involves creating a bleaching tray, completing the bleaching process, waiting for stabilization, and then restoring. This can take months to resolve the case.
Can we optimize this process?
The authors’ experience suggests that we can accurately predict the final shade and restorative material color. Using the latest bleaching materials, we can perform a complete home bleaching treatment without a tray, allowing for instant changes to tooth shape with restorative aesthetic materials. Composite restorations can also be corrected at any time, enabling adjustments to their shape and color.



Fig.1
The patient wants to enhance her smile, which has some small defects like incisal chipping diastemata and an unsatisfactory shape of the canines.
She was delighted to learn that we can whiten their teeth very easily, fast and safely.

Fig.2
A simulation of the final restoration by a realistic try-in. It depicts the actual material to be used in the real space, with the exact same final material and its intended position. This technique was first described in Layers 2 (Quintessence 2022) and is the ultimate color validation technique.
Despite selecting a slightly whiter shade, the integration is already outstanding. We will restore the teeth with this shade, complete the bleaching and if pertinent, create a small correction.

Fig.3
Teeth with a yellow hue are highly responsive to bleaching therapy. However, waiting for the teeth to bleach and stabilize can take months. Therefore, a different strategy is proposed: restoring the teeth first and then correcting them accordingly.

Fig.4
Digital Colorimeter measurement using Optishade Styleitaliano (Smile Line Switzerland). It provides a polarized picture with the same distance, illumination and calibration. Therefore, if taken correctly, it offers precise standardized photography and accurate color measurement. The system generates L*a*b* coordinates and identifies the closest shade from the chosen shade guide (data base). For bleaching therapy, a different color database is used for better understanding and evaluation. Here, we used the “Vita Bleached guide V1” which resulted in a color of 9 – an intermediate shade between 1 super white and 27 super dark.


Fig.5
A complete tissue retraction was done using B4 clamps. This strategy is part of “The Front Wing Technique” fully explained in the book Layers 2 (Quintessence 2022). The clamp retraction exposes the cervical portion of the tooth allowing the clinician to modify the emergency profile more efficiently without overhangs. No wax-up is necessary as this will be covered later.

Fig.6
Deep cleaning under a rubber dam using Aquacare (VELOPEX International, London, UK) Aluminium Oxide 29 Microns.
This was particularly effective in non-accessible areas like the proximal. No abrasive was used where unnecessary. Acid etching was performed with 15 (min) to 30 (max) seconds.

Fig.7
A single layer of Enamel Plus BF3 (high-value enamel) was applied to the buccal wall of a canine. The initial integration appears quite poor.

Fig.8
The figure shows that after distributing the increment, integration begins but the composite still appears whiter, but this is not the final aspect.
Regarding construction, we won’t attempt to adjust the palatal aspect as described in the author’s 2016 Front Wing technique.

Fig.9
The composite after polymerization achieves its final color and opacity. A poorly and incompletely polymerized composite won’t achieve this final appearance. The color used in the realistic try-in is applied.

Fig.10
Both front wings were modeled and polymerized. A 0.2mm gap between them is essential for providing perfect support to the anatomical matrices, allowing them to fully express their anatomy.

Fig.11
Bio Function BF3 (a high opacity enamel or low opacity body shade).
Although it’s indication is for layering on top of a dentin color, it’s ideal for single-shade restorations that blend seamlessly with natural teeth. We’ll create the buccal walls to the desired shape, even though a large palatal defect will remain present, this is part of the technique.

Fig.12
A sectional matrix (Unica Proximal, Polydentia, Mezzovico-Vira, Switzerland) was used to overcome and fill-up the defect from the palatal wall. These specifically designed anterior matrices feature a “shark fin” profile providing exceptional visibility and a gingival slot that offers high stability with minimal trauma. This significantly surpasses the classical posterior matrices adapted for anteriors and transparent matrices used for anterior teeth.

Fig.13
Another view of the Unica Proximal matrix perfectly leaning against the “Front Wing”.

Fig.14
The figure illustrates filling the first surface, in this case mesial of the canine. It shows how deep the composite material penetrates the cervical profile.

Fig.15
The process after the second defect (distal of the lateral) is filled and the second matrix is removed. This wedgeless approach could create suboptimal contact point which usually doesn’t bother the patient and can be easily corrected in future adjustments. It is not a priority to obtain a strong contact point at this moment.

Fig.16
The clamp was removed and the preparation for finishing under the rubber dam was started.
A metallic abrasive strip is used for the proximal area and a medium-grit Sof-Lex disc (Solventum, Minnesota, USA) for the surface.

Fig.17
Simplified polishing using just two steps: Eve Twist (medium coarse, EVE Ernst Vetter GmbH, Birkenfeld, Germany) and Lucida Paste (Diashine, Lynnwood, WA, USA) with a Lucida Felt wheel (Diashine, Lynnwood, WA, USA).

Fig.18
The teeth immediately after removing the rubber dam. They appear significantly dehydrated and much whiter than usual. Maintaining this level of whiteness would be ideal for both the clinician and the patient, but after rehydration happens this will revert completely.

Fig.19
For that purpose, home bleaching is given to the patient and explained in the same appointment, the SheerWhite! bleaching system (AMD Lasers, CAO Group, USA) can be delivered immediately.
These are self-adapting strips containing 15% Carbamide Peroxide that the patient wears daily for two hours and requires nothing more than patient education and information.

Fig.20
The teeth after the application of ten strips. The color dropped to almost five shades. The color was assessed using a digital colorimeter (Optishade Styleitaliano, Smile Line, Switzerland). The enamel appears bleached while the composite remains unchanged. This slight difference will diminish over the coming weeks as a small regression is common with most bleaching treatments.

Fig.21
By comparing the initial color (left) to the final color (right) we calculate a Delta E. A higher Delta E indicates more effective bleaching therapy.
A low Delta E suggests poor whitening and minimal color change. Thresholds are currently being studied and certified. Understanding DE in bleaching is straightforward with a scale from 1 to 10.

Fig.22
A digital drawing of the margins of the restorations.
These can be corrected in the future in case needed.

Fig.23
The figure showing control after two months, demonstrates a slight relapse (normal) and also improved integration. This indicates a correct prediction of the composite shades.

Fig.24
A comparison of the before and after bleaching. The photography was taken under identical conditions.

Fig.25
A comparison of the before and after bleaching. The photography was taken under identical conditions.
Conclusions
By shifting paradigms and embracing all-time concepts, particularly when benefiting patients and the dental community, we can discover alternative paths to success. Innovative methods like digital measurement and tray-less bleaching systems enhance treatment ability and reduce failure risks, such as constructing new expensive bleaching trays or encountering shade matching issues. Pre-bleaching restorations simplify the process and allow for quicker completion and a safety with the option of making corrections. Composite offers correction and bleaching strips offer flexibility, further expanding treatment options.
The author expresses gratitude to Dr Sara Laface and Dr Emma Devoto for their invaluable assistance during the treatment and the creation of this article.
Bibliography
- Layers 2 (Direct Composite Restorations), The Styleitaliano Clinical Secrets. Manauta, Salat, Devoto, Putignano, Quintessence Publishing 2022.
- Layers, An Atlas of composite resin stratification. Manauta, Salat, Quintessence Publishing 2012.
- Manauta J, Salat A, Monterubbianesi R, Tosco V, Devoto W, Orsini G, Putignano A. Advances in diastema closure and tooth shape change using direct composite restorations: the Front Wing Technique. Int J Esthet Dent. 2022 Nov 25;17(4):378-393.
- Manauta J, Devoto W, Rondoni D, Salat A, Kovacs-Vajna ZM, Putignano A, Digital dental shade measurement: Practical applications with a state-of-the-art colorimeter (non-indexed) Dental Tribune, 2022 May 19.
- Manauta J, Almeida G, Kovacs-Vajna ZM, Vervack V, Shaalan O, Devoto W, Faccoli M, Falacho RI, Putignano A. Precision layering techniques: Integrating digital tools for accurate color matching and realistic try-ins in anterior composite restorations. J Esthet Restor Dent. 2024 Aug 27.
- Menini M, Rivolta L, Manauta J, Nuvina M, Kovacs-Vajna Z.M, Pesce P, Dental Color-Matching Ability: Comparison between Visual Determination and Technology. Technology. Dent. J. 2024 Sep 3.