


Transforming a smile affected by dental malposition and failing Class III restorations in a single appointment may seem challenging. However, by prioritizing the anatomical control provided by the Unica Anterior matrix system, the process can be significantly simplified. In this case, we demonstrate how the synergy between matrix-guided contouring and the optical properties of the composite enables a highly efficient, predictable, and aesthetic result.


Fig.1
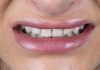
The patient expressed profound dissatisfaction with her smile. Years of “patchwork” dentistry had resulted in a neglected appearance that negatively affected her self-confidence. The lack of harmony was primarily caused by severe distal inclination and crowding, which created an unbalanced and visually “heavy” effect in the anterior region.

Fig.2
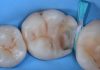
Beyond the surface inclinations, the palatal view revealed the true clinical challenge: multiple failing Class III restorations and carious lesions. Marginal leakage, staining, and poor proximal adaptation were the primary causes of the neglected appearance, requiring a complete aesthetic reset.

Fig.3
To achieve a moisture-controlled environment, a modified split-dam isolation technique was used. At this stage, the procedure involved more than simply removing the old composite and caries. The new Class III restorations were strategically used to begin correcting the distal inclination of the teeth. By doing so, a more favorable tooth axis and a solid structural foundation were established, significantly facilitating the optimal placement and performance of the Unica Anterior matrices in the following step.

Fig.4
To maximize bond strength and ensure precise anatomical control, a strict clinical sequence was followed. First, surface conditioning was performed using air abrasion with 29-micron aluminum oxide particles (Aquacare, Velopex International, London, UK) to effectively remove the aprismatic enamel layer. This was immediately followed by selective phosphoric acid etching.
Once the substrate was properly treated, rinsed, and dried, the Unica Anterior matrices (Polydentia) were meticulously positioned on the central incisors and strategically stabilized using a light-cured gingival barrier. Finally, the adhesive protocol continued with the rigorous application of a universal adhesive, ensuring meticulous penetration and polymerization.
The field was now fully prepared to initiate the StyleItaliano One-Shade protocol.

Fig.5
To establish proper midline harmony and symmetry, the protocol began with the simultaneous restoration of both central incisors. The Brilliant EverGlow composite was meticulously adapted using the snow-plow technique. This specific approach—utilizing a thin layer of uncured flowable composite driven by the packable composite—is crucial for ensuring void-free, seamless marginal adaptation while accurately replicating the emergence profile defined by the Unica matrices.

Fig.6
Following complete polymerization of the central incisors, the initial matrices were carefully removed. To achieve ideal proximal contacts and maintain optimal contour control throughout the anterior segment, the same restorative procedure was repeated sequentially. Individual matrices were first placed on the lateral incisors, and then on the canines. This disciplined, step-by-step progression is key to managing multiple restorations while preserving individual tooth anatomy and ideal interproximal spaces.

Fig.7
Once the direct restorations had been completed across the anterior segment, the finishing phase commenced. The initial step focused on gross excess removal and the establishment of the primary anatomy using flexible abrasive discs (Sof-Lex). This critical contouring step was meticulously performed at low speed without water irrigation. Working dry at this stage is essential because it allows uninterrupted visual control over the shaping process, ensuring the proper definition of the incisal edges, transition angle lines, and overall tooth proportions before adding surface texture.

Fig.8
To replicate the natural morphology of the anterior dentition, the StyleItaliano Finishing Bur Kit was used. The secondary anatomy was carefully developed using the F1 bur, creating the necessary surface texture and developmental depressions on the composite surface.

Fig.9
However, to avoid an artificial or excessively scratched appearance, the F5 bur was subsequently utilized. This crucial step delicately softened and blended the transitions of the textures previously created with the F1 bur, ensuring a natural interplay of light and shadow across the direct composite veneers.


Fig.10
Following the precise definition of the secondary anatomy, the pre-polishing phase was initiated. A pink pre-polishing spiral was used over the entire composite surface with gentle, intermittent pressure. The primary objective of this crucial step is to smooth the surface and effectively remove any microscopic scratches left by the finishing burs. Importantly, the flexibility of the spiral allows it to adapt seamlessly to the tooth morphology, ensuring that the delicate surface texture and transitional lines previously created are meticulously preserved, perfectly conditioning the composite for the final high-gloss stage.

Fig.11
To achieve an enamel-like final polish, the Lucida system was selected. The submicron, water-soluble diamond paste was applied using the Lucida felt star. With intermittent pressure, this system rapidly elevates the composite surface to a mirror-like gloss within seconds. The greatest clinical advantage of this protocol is its ability to deliver a definitive, brilliant luster while fully preserving the meticulously crafted secondary anatomy and surface texture established during the finishing phase.
The final result is a highly aesthetic direct composite veneer that integrates seamlessly with the natural dentition.

Fig.12
Before removing the rubber dam, a meticulous evaluation of the final shape and finish is mandatory. This isolated, dry environment provides the ideal setting to assess the primary and secondary anatomy, ensuring that all transitional lines, lobes, and embrasures are correctly defined. The high-gloss luster achieved with the Lucida system is clearly visible, reflecting light naturally across the composite surface. Confirming perfect marginal adaptation and proximal architecture at this stage guarantees a smooth biological transition once isolation is removed.

Fig.13
The final photograph, captured two weeks post-operatively, reveals the teeth fully rehydrated and demonstrates the seamless biointegration of the direct restorations. The composite exhibits exceptional optical properties, delivering a highly natural and lifelike chameleon effect that blends perfectly with the adjacent dentition. Crucially, the soft tissues exhibit excellent health and precise adaptation to the gingival margins. This optimal biological response confirms the correct management of the emergence profiles achieved with the Unica Anterior matrices (Polydentia), ensuring a long-lasting aesthetic and functional result.

Fig.14
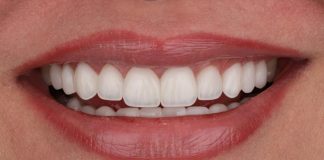
A direct comparison between the initial and final situations demonstrates the profound impact of this clinical approach. By combining the Unica Anterior matrix system with a simplified one-shade composite workflow, we successfully transformed a neglected and unbalanced smile—characterized by severe distal inclinations and failing restorations—into a harmonious and lifelike aesthetic result. The tooth axes were effectively corrected, and the proximal anatomy was fully restored. Most importantly, this comprehensive transformation was completed in a single appointment, demonstrating that a simplified One-Shade workflow can deliver outstanding, predictable, and highly aesthetic outcomes.

Fig.15
The true success of any anterior restorative procedure is ultimately evaluated within the broader context of the patient’s face. In this full-frontal smile view, the correction of the distal inclinations and the re-established midline symmetry become fully apparent. The composite integrates seamlessly not only with the adjacent dentition but also with the patient’s natural lip dynamics. Beyond the technical achievements, this image captures the most rewarding outcome: the restoration of the patient’s self-esteem and facial harmony.

Fig.16
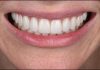
The three-quarter smile view is arguably the most critical perspective for assessing the three-dimensional success of an aesthetic case. From this dynamic angle, the ideal volumes and emergence profiles—predictably guided by the Unica Anterior matrices—are clearly visible, providing optimal support for the lip structure. Furthermore, the natural light reflection across the restorations confirms that the meticulously polished surface and refined secondary anatomy work together to create a highly aesthetic and attractive smile architecture.
Conclusions
The synergy between anatomical matrices, simplified shading protocols, and high-performance composites has revolutionized direct restorative dentistry. Achieving highly aesthetic restorations with predictable longevity is no longer an exhaustive multi-session process. By utilizing the Unica Anterior matrices for precise contour control and the Great composite system for seamless optical integration, clinicians can implement a highly efficient and reliable workflow. This approach not only meets the highest aesthetic and biological standards but also significantly enhances the patient experience by completing the transformation in a single appointment.
Bibliography
- Layers 2 (Direct Composite Restorations), The Styleitaliano Clinical Secrets. Manauta, Salat, Devoto, Putignano, Quintessence Publishing 2022.
- Layers, An Atlas of composite resin stratification. Manauta, Salat, Quintessence Publishing 2012.
- Shaalan O. Unica frame as key to success in direct veneering. 2022, styleitaliano.org
- Devoto W, Saracinelli M, Manauta J. Composite in everyday practice: how to choose the right material and simplify application techniques in the anterior teeth. Eur J Esthet Dent. 2010 Spring;5(1):102-24
- Krupinsky M. Monoshade composite Bonding. 2023, styleitaliano.org
- Krupinsky M. Multiple Diastema Closure with Filtek Easy Match Bright. 2025, styleitaliano.org