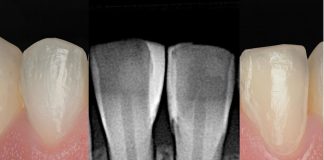
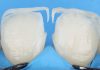
Direct posterior composite restorations remain one of the most common procedures in modern dental practice, offering patients durable, esthetic, and cost‑effective solutions. With continuous advances in dental materials, clinicians today benefit from techniques that are faster, more predictable, and longer‑lasting than ever before.
Among these innovations, bulk‑fill composites have transformed posterior restorations. Available in both flowable and paste viscosities, they simplify placement, reduce chair time, and maintain excellent biological integration. Their versatility allows clinicians to adapt the material to cavity design while ensuring optimal esthetic and functional outcomes.
This article highlights a practical approach to restoring Class II posterior cavities using one shade bulk‑fill composites of varying viscosities, demonstrating how efficiency and reliability can be achieved without compromising quality.

Fig.1
The patient presented with multiple carious lesions in the upper posterior quadrant, accompanied by old defective composite restorations.

Fig.2
Occlusion should always be recorded prior to each case in order to respect the patient’s occlusal contacts.

Fig.3
The cavities were opened by carefully removing the old defective composite restorations, which not only eliminated compromised material but also provided clear access to the underlying carious lesion for thorough debridement.

Fig.4
Final cavity preparation was completed and rubber dam isolation executed, ensuring total removal of carious tissue. Contact points were opened to eliminate residual decay and to facilitate proper placement of the matrix system.

Fig.5
Two matrices were placed on opposing Class II cavities. One matrix will be removed after completing the composite wall to ensure a proper contact point with the adjacent tooth. A 37% phosphoric acid solution was then selectively applied to the enamel for 30 seconds, achieving optimal etching before bonding.

Fig.6
A universal bonding agent (OptiBond™ Universal 360, Kerr, California, USA) was applied to both enamel and dentin, gently agitated for 15 seconds to enhance adhesion. The surface was then air‑dried for 10 seconds to effectively evaporate the solvent.


Fig.7
After applying the bonding agent and evaporating the solvent, the surface should appear shiny, confirming that the hybrid layer has been properly formed.
Teflon was placed between the ring and the matrix to ensure the adaptation of the matrix on the tooth.

Fig.8
Following cavity preparation, Simplishade Bulk Fill Flow (Kerr, California, USA) was applied to seal the dentin and reinforce the hybrid layer. The material was carefully spread across the surface to ensure complete coverage, then light‑cured according to manufacturer instructions. This step provided a strong foundation for subsequent composite layering and enhanced adhesion.


Fig.9
The walls of all Class II restorations were built using Simplishade Bulk Fill (Kerr, California, USA), a low‑stress, single‑shade composite paste. The quality of the contact points is evident, and with the walls completed, the cavities were effectively transformed into Class I preparations, ready for final restoration.

Fig.10
Final restorations were completed with SimpliShade Bulk Fill paste which is only one shade, and the occlusal anatomy was meticulously modelled using the Espresso Posterior technique. To enhance depth and natural esthetics, fissures were characterized with stains, producing a lifelike three‑dimensional effect.

Fig.11
The final restorations demonstrated excellent shade integration, blending seamlessly with the natural tooth structure. The composite adapted beautifully to the surrounding enamel and dentin, creating a lifelike appearance that preserved harmony within the smile. Beyond esthetics, the restorations maintained proper occlusal anatomy and contact points, ensuring both functional efficiency and long‑term stability.

Fig.12
The upper jaw before and after treatment.
Conclusions
This clinical case highlights the effectiveness of one shade modern bulk‑fill in achieving restorations that are both esthetically harmonious and functionally durable. Through careful isolation, precise cavity preparation, and meticulous reproduction of occlusal anatomy, the restorations blended seamlessly with the natural dentition, ensuring proper contact points and long‑term stability. The integration of selective etching, controlled bonding protocols, and characterization with fissure staining further enhanced the natural appearance, creating a lifelike three‑dimensional effect. Altogether, the workflow demonstrates how contemporary materials and techniques can simplify restorative procedures while delivering results that respect both biology and esthetics
Bibliography
- Hardan L, Sidawi L, Akhundov M, Bourgi R, Ghaleb M, Dabbagh S, Sokolowski K, Cuevas-Suárez CE, Lukomska-Szymanska M. One-year clinical performance of the fast-Modelling bulk technique and composite-up layering technique in class I cavities. Polymers. 2021 Jun 4;13(11):1873.
- Jordi Manauta: Back to basics: bulk and body. Styleitaliano.org
- Murad Akhundov: Bulk Fill composites to solve everyday direct posterior restorations. Styleitaliano.org