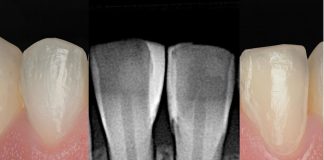
A clinical case by our Community members Dr. Yousef Elsayed
This article and its content are published under the Author’s responsibility as an expression of the Author’s own ideas and practice. Styleitaliano denies any responsibility about the visual and written content of this work.
Achieving a natural and harmonious smile requires a delicate balance between scientific precision and artistic sensitivity.
This case demonstrates the potential of direct composite veneers when executed with meticulous layering and finishing protocols. By carefully rebuilding tooth anatomy and optical effects layer by layer, it is possible to restore not only esthetics but also function and longevity in a minimally invasive manner. The initial clinical situation presented fractured central incisors, active carious lesions, failing restorations, and generalized discoloration—factors that compromised anterior esthetics. Direct composite veneers were chosen as the treatment of choice to restore form, function, and natural smile harmony.


Fig.1
The initial situation revealed active carious lesions, plaque accumulation, gingival inflammation, enamel demineralization, fractured central incisors, and aged restorations. Comprehensive documentation of these findings was essential for accurate diagnosis and guided the minimally invasive restorative plan using direct composite veneers.

Fig.2
Digital Smile Design (DSD) was utilized to establish ideal dental proportions and a harmonious smile line. Careful planning of tooth length and width guided the restorative process, ensuring optimal esthetic integration and functional balance.

Fig.3
The next phase focused on defining the tooth morphology. Considering the patient’s young age and masculine features, a sharper incisal design was chosen to emphasize a youthful and dynamic appearance.

Fig.4
After finalizing the design, a 3D digital impression was taken to generate an accurate digital model of the planned smile. A temporary acrylic mock-up was fabricated and tried in to verify occlusion and esthetics. This precaution minimized the need for intraoperative adjustments that could compromise shade accuracy and the final layering outcome. Phonetics were also carefully assessed before proceeding with the definitive restorations.

Fig.5
The designed cast was 3D printed to serve several key purposes: first, to fabricate a full-arch silicone index for the mock-up; second, to create a precise palatal index that served as a reliable reference for constructing the palatal shell; and third, to act as a height guide during the finishing and polishing phases if any reference was lost. This workflow ensures accuracy throughout the layered composite restoration process and enhances overall clinical predictability.

Fig.6
Isolation was achieved using a rubber dam to ensure a clean, dry, and stress-free working field—an essential condition for optimal adhesive performance. Floss ligatures helped achieve effective gingival retraction and tissue management, ensuring ideal contour and adaptation of the composite material during build-up.

Fig.7
Minimal and conservative tooth preparation was performed, limited to the removal of active carious lesions and defective restorations. Maximum enamel preservation was prioritized to optimize bond strength and ensure the long-term durability of the composite veneers.

Fig.8
The tooth surfaces were sandblasted with aluminum oxide particles to increase surface roughness and remove any contaminants. Then, etching was performed with 37% phosphoric acid—30 seconds on enamel followed by a two-step self etch bonding approach to the dentin and light curing. A thin 0.5 mm layer of composite was mixed with modeling resin to optimize handling and sculpting and then was placed onto the index using a specific instrument.

Fig.9
The palatal shell was built incrementally, starting with two teeth on one side, followed by light curing, and then proceeding to the opposite side. This method allowed controlled application of pressure, ensuring structural integrity and optimal adaptation of the palatal shell.

Fig.10
Proximal walls were built using a body-shade composite and the Unica anterior matrix to simultaneously create the gingival seat and proximal contours. This technique ensured precise anatomical form, tight contact points, and predictable emergence profiles, facilitating subsequent layering and finishing steps. As shown by the contour, the use of an anatomically preformed matrix provided well-defined line angles and natural morphology.

Fig.11
A dentin-shade composite was applied as the core layer to reproduce natural dentin opacity. In the incisal region, a mix of clear composite with subtle blue and grey tints was used to recreate natural translucency and depth. The incisal halo effect was achieved using a diluted white tint in flowable material to enhance light diffusion and replicate natural optical characteristics. This precise layering technique resulted in a lifelike, polychromatic restoration with seamless esthetic integration.

Fig.12
To enhance the esthetic outcome, a white tint was applied to the mamelons, creating a smooth color gradient from the cervical to the incisal areas. The shade gradually lightened toward the incisal edge, producing a natural and youthful appearance. This color grading was selected by the patient after reviewing several options from previous cases, reflecting a personalized esthetic preference.

Fig.13
Delicate applications of diluted white tint were strategically placed on the incisal area to connect the halo with the dentin mamelons, enhancing natural light diffusion. Small yellow accents were added in the cervical region to reproduce the intrinsic chromatic nuances of natural dentin. These characterizations contribute to a lifelike appearance and seamless integration of the restoration within the natural smile.



Fig.14
The final enamel layer was applied using a high-translucency enamel shade to reproduce natural enamel characteristics. A thin 1–2 mm layer was sculpted to mimic natural enamel thickness, with modeling resin used to prevent air entrapment and allow precise contouring. This final layer enhanced depth, light transmission, and the overall lifelike appearance of the restoration.

Fig.15
The final composite layer was light-cured through a glycerin barrier to eliminate the oxygen-inhibited layer and ensure complete polymerization of the superficial surface. This step prevented surface tackiness and improved the restoration’s mechanical properties and long-term durability.

Fig.16
The composite restorations underwent initial finishing and polishing to refine anatomical details and surface texture. These polished teeth served as a reference for building the canine restorations, ensuring harmony, symmetry, and consistency throughout the smile design.

Fig.17
After completing the adhesive procedure, the palatal shell of the canine was built using a body-shade composite, following the same protocol as the central restorations. Unlike the central incisors, the canine naturally exhibits lower translucency; therefore, a slightly more opaque shade was selected to replicate its inherent characteristics and ensure harmonious integration with adjacent teeth.

Fig.18
Finishing discs were used for precise contouring and smoothing of the composite palatal shell, ensuring accurate morphology and surface uniformity.

Fig.19
Proximal walls and the emergence profile were built using a body-shade composite with the Unica anterior matrix system in place. This technique ensured precise anatomical contours and tight contact points, creating a stable foundation for subsequent layering and natural emergence profiles.

Fig.20
Contouring the proximal walls using the red coarse disc.

Fig.21
The dentin core was built using an opaque dentin-shade composite to reproduce natural dentin opacity and achieve the desired masking effect. A ice-white tint was layered over the mamelons to replicate natural incisal characteristics and translucency.

Fig.22
The final enamel layer was delicately applied as a thin 1–1.5 mm increment of high-translucency enamel composite. Modeling resin was used to soften the material, allowing precise manipulation and contouring with a fine composite brush.

Fig.23
Finishing of the canine was performed using fine finishing discs, carefully sculpting the anatomy to achieve smooth surfaces and natural contours. Small additions of dentin-shade composite were placed on the lateral surfaces to avoid an artificial appearance and enhance natural depth and color transition.

Fig.24
The final polishing was completed using multi-step twist polishers to achieve a smooth, glossy surface with high esthetic quality. These instruments provided controlled abrasion and surface refinement, enhancing the natural optical properties of the composite restorations.

Fig.25
Special attention was given to finishing the incisal edges, as these areas—along with the marginal walls—are most prone to plaque accumulation and staining. Careful smoothing and polishing of these surfaces help prevent future discoloration and ensure long-term esthetic stability and functional longevity of the restorations.

Fig.26
The final restorations exhibit a natural, high-quality appearance with smooth surfaces and seamless integration. Meticulous layering, finishing, and polishing protocols contributed to optimal light reflection and esthetic harmony, closely replicating the optical properties of natural dentition.

Fig.27
Initial discoloration and surface irregularities were transformed through meticulous, stratified layering of composite resin. Each layer was precisely applied to rebuild natural anatomy, depth, and translucency. The final result reveals a harmonious, lifelike smile with smooth surfaces and seamless integration, highlighting the potential of minimally invasive direct composite veneer techniques.
Conclusions
Composite veneers represent a highly precise, technique-sensitive treatment modality that requires meticulous attention to detail and adherence to well-established protocols. When executed correctly—as demonstrated in this case—they can be transformative, delivering exceptional esthetic results with minimal invasiveness. The success of direct composite veneers depends on meticulous layering, optimal adhesion, and refined finishing techniques that together create a natural, harmonious smile integrated with the patient’s dentition.
Bibliography
- Shastri M, Dhaded S. Direct Composite Veneers Using A Minimally Invasive Technique For Fluorosis And Rotated Teeth. Guident. 2017;10(3):32–34.
- Korkut B, Yanıkoğlu N, Günday M. Smile makeover with direct composite veneers: A two-year follow-up. Case Reports in Dentistry, 2018, Article ID 6076883. PMC6076883
- Rizzante FAP, de O. Basting RL, Rodrigues JA. Longevity of Direct Composite Resin Restorations: A Systematic Review and Meta-Analysis. Operative Dentistry. 2021;46(6), 643-664.
- Dietschi D, Grebnfurher S. Composite resin restorative technique for the anterior teeth: Clinical and esthetic considerations. 2016, Quintessence Publishing.