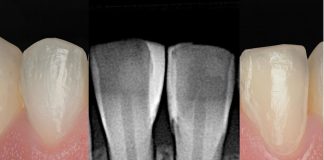
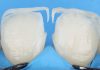
A clinical case by our Community member Dr. Mohammed Haji
This article and its content are published under the Author’s responsibility as an expression of the Author’s own ideas and practice. Styleitaliano denies any responsibility about the visual and written content of this work.
Anterior composite restorations remain clinically demanding, requiring careful attention to natural tooth morphology, esthetic characterization, and durable results. Despite advances in composite materials and adhesives, success still depends heavily on technique and execution time.
This case report outlines a systematic approach to anterior composite restoration, focusing on proper isolation, strategic layering, precise finishing, and thorough quality checks. This structured protocol helps clinicians achieve predictable, natural-looking outcomes more efficiently and consistently.

Fig.1
A 27-year-old postgraduate student comes to the clinic with a complaint about her smile.

Fig.2
The patient presented with anterior teeth requiring esthetic enhancement. A black background contraster was positioned behind the teeth to eliminate visual distractions and enhance contrast. This technique allows precise evaluation of incisal edge position, embrasure forms, translucency patterns, and overall tooth morphology. The black background reveals the true characterization needs and helps in identifying areas requiring composite placement, making it an essential diagnostic tool in anterior esthetic planning.

Fig.3
Pre-operative occlusal assessment.

Fig.4
Proper isolation using rubber dam is fundamental for successful adhesive procedures. The rubber dam provides absolute moisture control, prevents salivary contamination, improves visibility, protects soft tissues, and creates an optimal environment for bonding. This critical step ensures predictable adhesion and longevity of the restoration while allowing the clinician to work efficiently without interruption.

Fig.5
Crafting the mamelons and labial lobes.

Fig.6
During the shaping stage, careful attention was paid to identifying and correcting any irregularities. Symmetry between the central incisors was continuously evaluated to ensure harmonious proportions and balanced esthetics. The tooth contours, incisal edge positions, and overall morphology were refined to achieve bilateral symmetry. This step requires frequent evaluation from multiple angles and may involve minor adjustments to perfect the form before moving to the finishing stage.

Fig.7
Putting the Lucida Polishing Paste to keep the labial surface more rehydrated and get a glossy surface.

Fig.8
After appropriate finishing, start the polishing step by using step two twist polishing wheel.

Fig.9
Interproximal surfaces were refined using a medium-grit composite polishing strip. This step eliminates any remaining surface irregularities in the contact areas and gingival embrasure spaces. Smooth interproximal surfaces are essential for preventing plaque retention, maintaining gingival health, and ensuring patient comfort. The medium-grit paste provides effective smoothing while preparing the surface for final high-gloss polishing.

Fig.10
The final interproximal polishing was performed using fine-grit polishing strips. These strips provide the ultimate smoothness to interproximal surfaces, achieving a high-gloss finish comparable to the facial surface. The fine-grit strips effectively remove any micro-scratches left by the medium-grit instruments, resulting in a surface that resists staining and promotes optimal soft tissue health.

Fig.11
Any interproximal overhangs or excess composite. Eliminating overhangs is critical for gingival health, preventing plaque accumulation, and ensuring proper contact point formation with adjacent teeth.

Fig.12
A specialized star wheel designed for composite polishing was used to achieve maximum gloss on the facial surface. This instrument was carefully moved across all surfaces while distributing the polishing paste evenly. The star wheel’s unique design allows for effective polishing without generating excessive heat, which could damage the restoration or underlying tooth structure. Multiple passes ensure comprehensive coverage and uniform luster across the entire restoration.

Fig.13
The incisal/occlusal view demonstrates the corrected smile arch and the harmonious relationship between the maxillary anterior teeth. This perspective reveals the proper curvature of the incisal edges, which should follow the contour of the lower lip during smiling. The smile arch correction is essential for creating a youthful and esthetically pleasing appearance.

Fig.14
Before rubber dam removal, a comprehensive evaluation of the restorations was performed. This included checking the surface gloss, marginal adaptation, contour accuracy, and overall esthetic integration. The isolated environment allows for optimal visualization and any necessary final adjustments. This critical quality control step ensures that the restoration meets the highest standards before the patient evaluates the result.

Fig.15
The final frontal view of the patient’s smile demonstrates the successful esthetic outcome achieved through systematic composite restoration. The restorations exhibit natural translucency, proper characterization, harmonious proportions, and seamless integration with the surrounding dentition. The patient’s smile displays enhanced esthetics while maintaining a natural, life-like appearance that respects individual facial characteristics.

Fig.16
The contra-lateral view confirms the bilateral symmetry and balanced appearance of the completed restorations. Both lateral perspectives should demonstrate consistent contours, similar light reflection patterns, and harmonious integration with the patient’s facial features. This final documentation validates the success of the systematic approach employed throughout the treatment.

Fig.17
Before and after.
Conclusions
This case shows that anterior composite restorations don’t have to be unpredictable; following a clear, structured protocol makes the outcome consistent and repeatable. Careful isolation, thoughtful layering, precise surface texturing, and thorough finishing all work together to produce esthetic, durable results in a practical amount of chair time.
Success ultimately comes down to discipline: treating each step, from the initial shade/contour assessment against a black background through to checking the bite at the end, as essential to the final result. Combining today’s composite materials with a methodical technique and close attention to tooth anatomy lets restorations blend naturally with the surrounding dentition while holding up well over time.
In short, this systematic approach takes the guesswork out of anterior composite work and gives clinicians a dependable roadmap for consistently excellent direct adhesive restorations.
Bibliography
- Devoto W, Saracinelli M, Manauta J. Composite in everyday practice: how to choose the right material and simplify application techniques in the anterior teeth. Eur J Esthet Dent. 2010 Mar 1;5(1):102-24.
- Manauta J, Salat A. Layers, An atlas of composite resin stratification. Quintessence Books, 2012.
- Dietschi D. Optimizing smile composition and esthetics with resin composites and other conservative esthetic procedures. European Journal of Esthetic Dentistry. 2008;3(1):14-29.
- Devoto W, Pansecchi D. Composite restorations in the anterior region: clinical and aesthetic performances. Practical Procedures & Aesthetic Dentistry: PPAD. 2007 Sep 1;19(8):465-70.
- Hardan L, Bourgi R, Kharouf N, Mancino D, Zarow M, Jakubowicz N, Haikel Y, Cuevas-Suárez CE. Bond strength of universal adhesives to dentin: A systematic review and meta-analysis. Polymers. 2021 Mar 7;13(5):814.