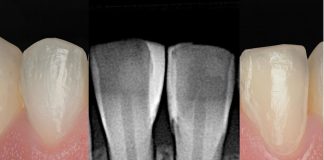
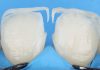
Most of our daily work is direct, so we should have the knowledge and skills to do good composite restorations, and gaining the right skills require daily training on a predictable, simple, and repeatable technique with the right instruments. Posterior layering is often considered a complex task—generally unpredictable and frequently requiring numerous occlusal adjustments. Additionally, direct posterior restorations are time-consuming because multiple small increments must be applied and cured individually to manage shrinkage stress.
While there are many techniques and instruments available for direct posterior modeling, what we truly need is a simple and efficient method to make the process faster and more predictable.
In this article, we will show the new LM Replica Posterior instrument designed to simplify occlusal modeling.

Fig.1
The initial situation shows the right lower posterior quadrant with multiple caries and old, defective amalgam restorations. The patient presented with complaints of sensitivity to cold.

Fig.2
Prechecking the occlusion before starting the restorative procedure is essential to establish a reference point for accurately restoring the occlusal contacts. Following this, rubber dam isolation is applied to ensure a clean, contamination-free working environment.

Fig.3
The StyleItaliano Direct Burs Kit will be utilized in this case. Six out of the nine burs have been selected to address even the most complex scenarios in posterior cavity preparation.


Fig.4
D1 – Amalgam Removal Bur
A carbide pear-shaped bur designed for efficient and rapid amalgam removal.

Fig.5
After gaining initial access and removing the old amalgam, we proceed to remove the remaining caries and perform cavity debridement.

Fig.6
D3D4/D5 – Caries removal
The slow-speed carbide round bur is available in three sizes. The appropriate size is selected based on the cavity dimensions and the extent of the lesion, with larger sizes used for complete caries removal.

Fig.7
D2 – Composite removal and cavity shape
This bur serves a dual purpose: removing old composite material and shaping the cavity, particularly refining the geometry of the enamel walls.

Fig.8
D7 – Delicate cavity cleaning
The medium-fine grit round bur is ideal for removing caries or contamination in areas where minimal vibrations are required.

Fig.9
Selective enamel etching was carried out for 30 seconds using 35% phosphoric acid.

Fig.10
A frosty white appearance was observed, indicating sufficient enamel etching.

Fig.11
A universal bonding system (self-etch universal adhesive, by Solventum) was applied with active rubbing for 20 seconds to ensure optimal interaction of the bond with both enamel and dentin.

Fig.12
Light curing was performed using the Eighteeth Curing Pen. This polywave LED curing device features a small, pivoting head that provides easy access to even difficult areas, ensuring optimal light incidence.


Fig.13
A small layer of flowable composite was applied to seal the bond layer and dentin before placing the packable composite.

Fig.14
The LM Replica Posterior from LM Arte is a clever instrument designed to simplify occlusal modeling of posterior teeth in direct composite restorations. This tool makes occlusal modeling fast, simple, and predictable. The occlusal anatomy of a single tooth can be easily shaped, guided by the buccal cusps, using the Replica Technique with this specific instrument. The instrument features one concave and one convex side and can also be used with the Fast Modeling Technique developed by Prof. Louis Hardan and Dr. Murad Akhundov.


Fig.15
The concave side of the LM Replica Posterior instrument is designed for precise shaping and contouring of the occlusal surface.

Fig.16
The convex side of the LM Replica Posterior instrument is used for creating smooth, rounded contours on the occlusal surface.

Fig.17
It works in three stages: adapt, shape, and replicate.

Fig.18
Adapt stage: Using the convex side to carry the bulk-fill posterior composite and begin the adaptation process.

Fig.19
Adapt stage: Adapting the composite at a 45-degree angle, following the orientation of the buccal cusps.

Fig.20
Adapt stage: Adapting the composite at a 45-degree angle, following the orientation of the lingual cusps.

Fig.21
Shape stage: After adapting the composite and following the inclination of the buccal and lingual cusps, we are ready to proceed with occlusal shaping.

Fig.22
Shape stage: We are now guided by the buccal cusps, as there are three cusps on the lower first molar. By positioning the sharp, curved end of the active tip perpendicular to the occlusal surface, we shape the first cusp curve.

Fig.23
Shape stage: Positioning the sharp, curved end perpendicular to the occlusal surface, with the concave side facing the buccal, we shape the first cusp ridge slope.

Fig.24
Shaping the first buccal cusp.

Fig.25
Next, we repeat the same step for the second and third cusps.

Fig.26
We then repeat the same step for the second and third cusps.

Fig.27
By using the side edge parallel to the lingual half, we define the lingual cusps.

Fig.28
Replicate the occlusal anatomy of the other teeth using the same steps, creating an occlusal replica of the posterior teeth.

Fig.29
Seal the grooves with a brown tint to enhance the natural occlusal anatomy.

Fig.30
Finish using an Enhance rubber wheel to smooth the surface and remove composite irregularities, preparing the surface for the final polishing step.

Fig.31
Single-step Lucida polishing is performed using a star-shaped felt and submicron super-active diamond paste from Diashine.

Fig.32
Immediately after finishing and polishing.

Fig.34
Final situation.

Fig.33
After checking the occlusion with an articulating paper.

Fig.35
Final situation.
Bibliography
- Scolavino S, Paolone G, Orsini G, Devoto W, Putignano A. The Simultaneous Modeling Technique: closing gaps in posteriors. Int J Esthet Dent. 2016 Spring;11(1):58-81. PMID: 26835524.
- Manauta J, Salat A. Layers An Atlas of Composite Resin Stratification. 2012. Quintessence Pub.
- Van Dijken JW, Pallesen U. 2016. Posterior bulk-filled resin composite restorations: a 5-year randomized controlled clinical study. J Dent. 51:29–35.
- Leprince JG, Palin WM, Vanacker J, Sabbagh J, Devaux J, Leloup G. Physico-mechanical characteristics of commercially available bulk-fill composites. J Dent. 2014 Aug;42(8):993-1000.
- Nitta K. Effect of light guide tip diameter of LED-light curing unit on polymerization of light-cured composites. Dent Mater. 2005;21:217–23.
- Rueggeberg FA. State-of-the-art: dental photocuring – a review. Dent Mater. 2011;27:39–52
Conclusions
Simplifying occlusal modeling requires the use of straightforward techniques and smart instruments to overcome daily challenges, ensuring predictability while minimizing both time and stress for clinicians.