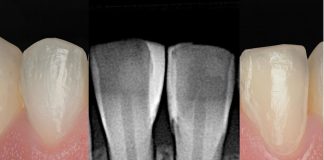
How can we manage Class III Black’s lesions in a simple, efficient, and predictable way?
This article explores two techniques, offering a clear comparison to help you handle these cases with ease and confidence.


Fig.1
Palatal view of the lesions.

Fig.2
Close up of the lesions.

Fig.3
Isolation of the operating field using the “Vision” rubber dam by ASA Dental.


Fig.4
Thanks to PolydentiaPRO matrices, we can protect the neighboring teeth during cavity cleaning, ensuring a more conservative approach.

Fig.5
The cavities were prepared on the mesial surface of tooth 22, the distal surface of tooth 21, the mesial surface of tooth 12, and the distal surface of tooth 11. Due to the minimal extent of caries on teeth 11 and 21, I opted not to open the cavities on the vestibular side. Instead, I approached the restorations from the distal and palatal views to ensure seamless integration.

Fig.6
Etching step.

Fig.7
For the adhesive procedure, I used a universal adhesive to ensure optimal bonding and versatility.

Fig.8
For educational purposes and to demonstrate the benefits of using new matrices (Unica Proximal by Polydentia), I chose this technique for the distal restorations on teeth 11 and 21. The approach involves a pre-curved anterior matrix with a gradually increasing diameter, secured cervically with a wooden wedge.
I applied a single layer of composite material: first a flowable composite, followed by paste, without curing the flowable layer (the reason for this will be explained in later slides). For application, I used the DD Modella instrument from the StyleItaliano Arte kit by LM.

Fig.9
This image clearly highlights the excess material on both the incisal and cervical aspects, requiring extensive finishing to refine the restoration.

Fig.10
Using Sof-Lex™ Discs by Solventum.


Fig.11
And abrasive strips.

Fig.12
After completing the restoration on tooth 11, we proceed to the mesial side of tooth 12. As shown, the Unica Proximal matrix fits perfectly to the tooth structure, even without the use of a wedge, despite the slightly challenging shape of the tooth.

Fig.13
I placed a drop of flowable material between the tooth margin and the matrix.

Fig.14
Without curing the flowable, I proceeded to add the Filtek™ Easy Match (by Solventum) composite material in a single step. Leaving the flowable uncured at the cavity base allows it to spread evenly, minimizing the risk of gaps or air bubbles. This technique ensures complete curing, as the thin layers can be effectively polymerized from both the buccal and palatal sides.
Note: It is crucial to ensure the matrix is perfectly adapted to the tooth margins. This prevents uncontrolled seepage of the flowable material, which could complicate the finishing process.

Fig.15
Immediate post-op after matrix removal. Now we just need to finish and polish the restoration.

Fig.16
For the finishing of the restoration, I used:
• Perio bur from the Intensiv StyleItaliano Direct Burs Kit (buccal surface)
• Sof-Lex™ Brown Disc by Solventum (buccal-mesial surface)
• Finishing file mounted on the Swingle handpiece by Intensiv/W&H (mesio-cervical surface)


Fig.17
Immediately after finishing. To polish the restorations I used the one-step Diamond Paste from Diashine.

Fig.18
Palatal view of the completed restorations at the 15-day follow-up.

Fig.19
Final image at the 2-week check-up. As seen, the restorations are seamlessly integrated into the patient’s smile. I suggested addressing the demineralization on tooth 21, but the patient opted not to proceed with the treatment.
Conclusions
In conclusion, this article highlights the ease of use of Unica Proximal matrices. With their correct application and the use of advanced composite materials that eliminate the need for complex layering techniques, we can achieve fast, simple, and predictable restorations in minimal time.
Bibliography
-
- Manauta J, Salat A. Layers: An atlas of composite resin stratification. 2012, Quintessence Publishing.
- Manauta, Salat, Devoto, Putignano. Layers 2 Direct composites: The Styleitaliano Clinical Secrets. 2002, Quintessence Publishing.
- Brenna F. Odontoiatria restaurativa: Procedure di trattamento e prospettive future. 2009, Elsevier.
- Hardan. Protocols for Mobile Dental Photography with Auxiliary Lighting. 2021, Quintessence Publishing.