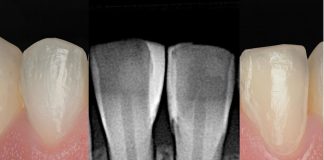
A clinical case by our Community member Dr. Basem Elias
This article and its content are published under the Author’s responsibility as an expression of the Author’s own ideas and practice. StyleItaliano denies any responsibility about the visual and written content of this work.
In emergency cases, it is our duty to provide patients with solutions that are both scientifically sound and aesthetically pleasing. Seven years ago, this patient presented with two discolored central crowns, which were replaced with lithium disilicate crowns. The treatment was successful, and the patient was satisfied with the outcome.
Recently, the same patient contacted the clinic with an urgent situation. Her front tooth had fractured, and she was due to leave the country within two days for a six-month period. During the clinical session, her medical and dental history was reviewed, and she explained that the fracture had occurred while attempting to open a plastic bag using her crown. Considering the limited time before her travel, a provisional treatment plan was established. The ceramic was repaired with composite to provide an immediate functional and aesthetic solution. A definitive replacement of the restoration will be carried out once the patient returns.


Fig.1
The initial situation, front view.

Fig.2
The initial situation, retracted lips front view.

Fig.3
The use of a cross-polarization filter allows the elimination of unwanted reflections and glare on the teeth caused by the flash, thereby revealing greater detail in the tooth and restoration structure, including the internal layers and characterizations. In this case, the details observed include a halo effect, mamelons, and white spots.

Fig.4
Shade selection was performed using the button try. The enamel shades included OM Opal Modifier Essentia, NE Natural Enamel Asteria, MD Medium Dentine Essentia, and A2 Palfique LX5.

Fig.5
Confirming the enamel shade in a black-and-white photograph allows the elimination of hue and chroma, making it easier for the eyes and brain to assess the value.

Fig.6
Confirming the dentine shade using a cross-polarization filter photograph eliminates enamel reflections, allowing a clearer and more accurate match of the chromatic dentine shade.

Fig.7
A freehand mock-up was created using composite without any tooth surface conditioning, in order to fabricate a silicone index for the palatal shield.

Fig.8
Clamp-less rubber dam isolation.

Fig.9
The fracture line was beveled and smoothed, removing the glaze to expose the lithium disilicate and achieve better blending between the two restorative materials, ceramic and composite.

Fig.10
Fitting of the silicone index.

Fig.11
The adjacent teeth were protected with a metal band. The lithium disilicate surface was etched with 5% hydrofluoric acid for 20 seconds, followed by thorough rinsing with distilled water and complete drying.

Fig.12
A 37% phosphoric acid gel was applied for 60 seconds. The surface was then thoroughly rinsed with distilled water and carefully dried. The purpose of this step is to clean the surface and remove residual salts.

Fig.13
An etched, cleaned, and glaze-free ceramic surface was obtained.

Fig.14
Silane was applied and left in place for 1 minute.



Fig.15
Drying was performed under maximum air pressure for 30 seconds with vacuum suction to ensure complete evaporation of the solvent. Finally, the surface was inspected to confirm the absence of white residues.

Fig.16
A universal adhesive containing 10-MDP monomer was applied over the etched surface and gently rubbed for 10 seconds. The surface was then dried under maximum air pressure for 5 seconds with vacuum suction, followed by light curing for 20 seconds.

Fig.17
The palatal shell was built with the aid of a silicone index, using enamel shade.

Fig.18
The proximal wall was built with the aid of a sectional matrix, using enamel shade.

Fig.19
Enamel shell ready for layering.

Fig.20
The first layer of dentin (MD Medium Dentin Essentia) was applied, providing medium chroma and sufficient opacity to eliminate the shadow effect through the restoration. Mamelons were created, leaving space for the halo effect, and the layer was light-cured for 20 seconds.

Fig.21
White stain (WM White Modifier Essentia) was applied to reproduce the same characterizations.

Fig.22
The second layer was applied using body shade A2 Palfique LX5 in the middle third of the tooth to achieve better shade blending. Care was taken not to extend this layer over the halo effect area on the incisal edge.

Fig.23
The final enamel layer was applied on the incisal edge.

Fig.24
After finishing and polishing.

Fig.25
Final Cross-Polarization filter photograph.

Fig.26
The polished repair restoration.

Fig.27
Final Cross-Polarization filter photograph.

Fig.28
Final retracted lips front view.
Conclusions
Understanding the properties of restorative materials and the corresponding adhesion protocols is the cornerstone of modern restorative dentistry.
Bibliography
- Magne P, Belser UC. Biomimetic restorative dentistry. 2nd ed. 2022. Quintessence Publishing.
- Manauta J, Salat A. Layers: An atlas of composite resin stratification. 2012. Quintessence Publishing.
- Manauta J, Salat A, Devoto W, Putignano A. Direct composites: The Styleitaliano clinical secrets. 2022. Quintessence Publishing.